Using Network Load Balancing
Create resources within a Load Balancer for use as a Network Load Balancer.
Prerequisite
The project's wallet balance must be greater than 0 (see how to top up a project's wallet).
A ready-to-use Load Balancer must exist (see how to create a Load Balancer).
Instructions
1. Go to the Backend Group creation page
On the Load Balancer Detail page, under the "Overview" tab, click the CREATE BACKEND GROUP button in the top menu bar or in the instruction card on the top right.

2. Configure the Backend Group
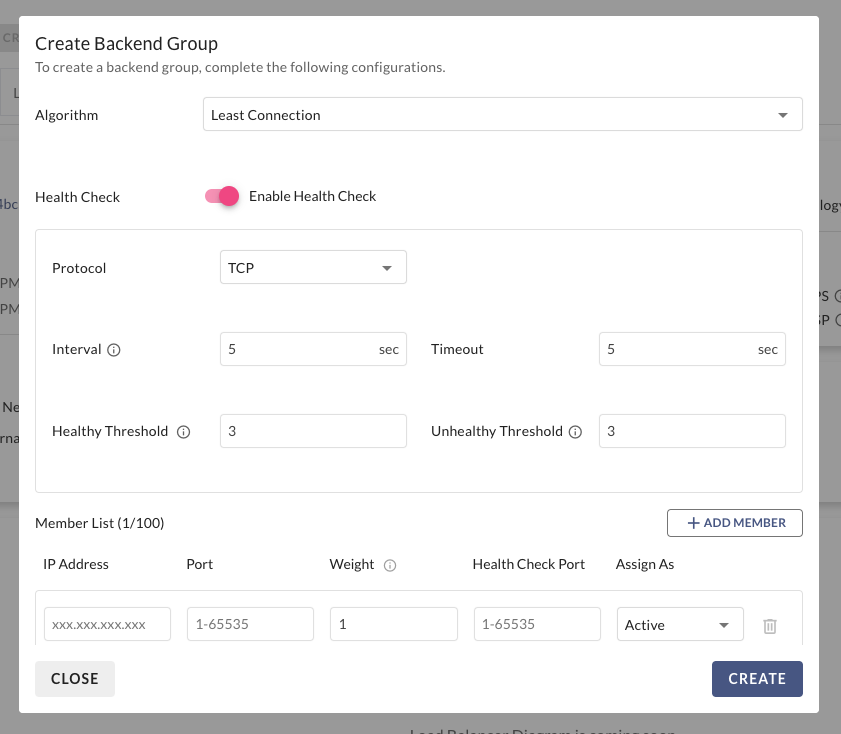
On the "Create Backend Group" page, select the protocol as TCP or UDP. This protocol must match the listener that will receive traffic. Also, provide a Name and select a load balancing Algorithm for the Backend Group.

3. Configure Health Check
Choose whether to enable a Health Check, which will monitor the status of the members within the Backend Group. Configure the frequency and type of the health check.

4. Configure Members
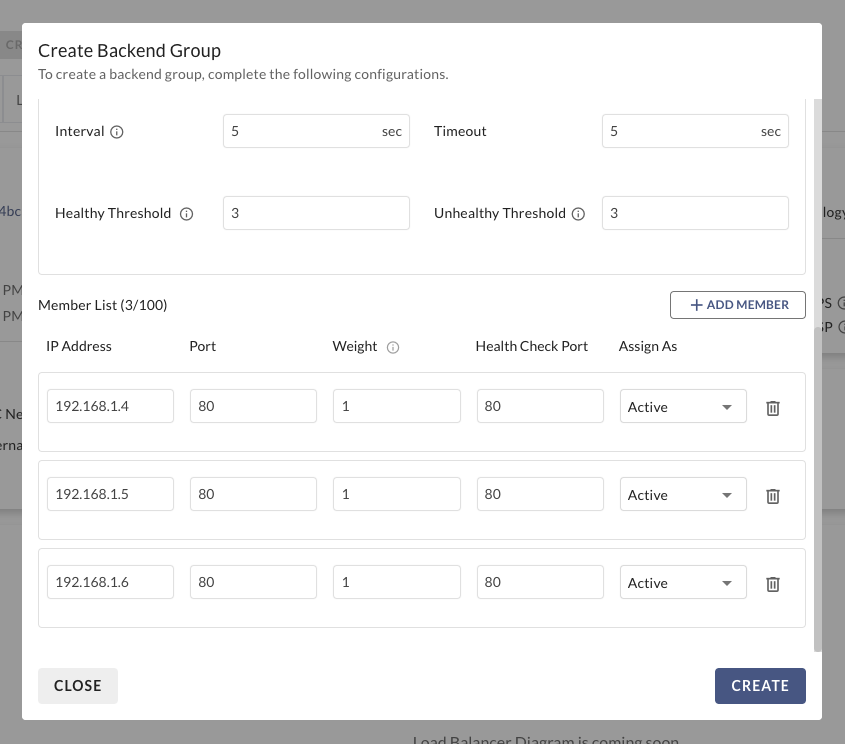
Select the IP Address and Port for each member that will receive traffic from the Load Balancer, then click CREATE to confirm the creation of the Backend Group.

5. Go to the Listener creation page
You will be taken to the Load Balancer Detail page under the "Backend Group" tab. Wait until the Load Balancer's status is no longer "Updating," then click the CREATE LISTENER button.

6. Configure the Listener
On the "Create Listener" page, set the Protocol to TCP or UDP, define the Port, and select a Backend Group that uses the same protocol. Configure any other settings as needed, then click CREATE to confirm.

7. Wait for the Listener to be created
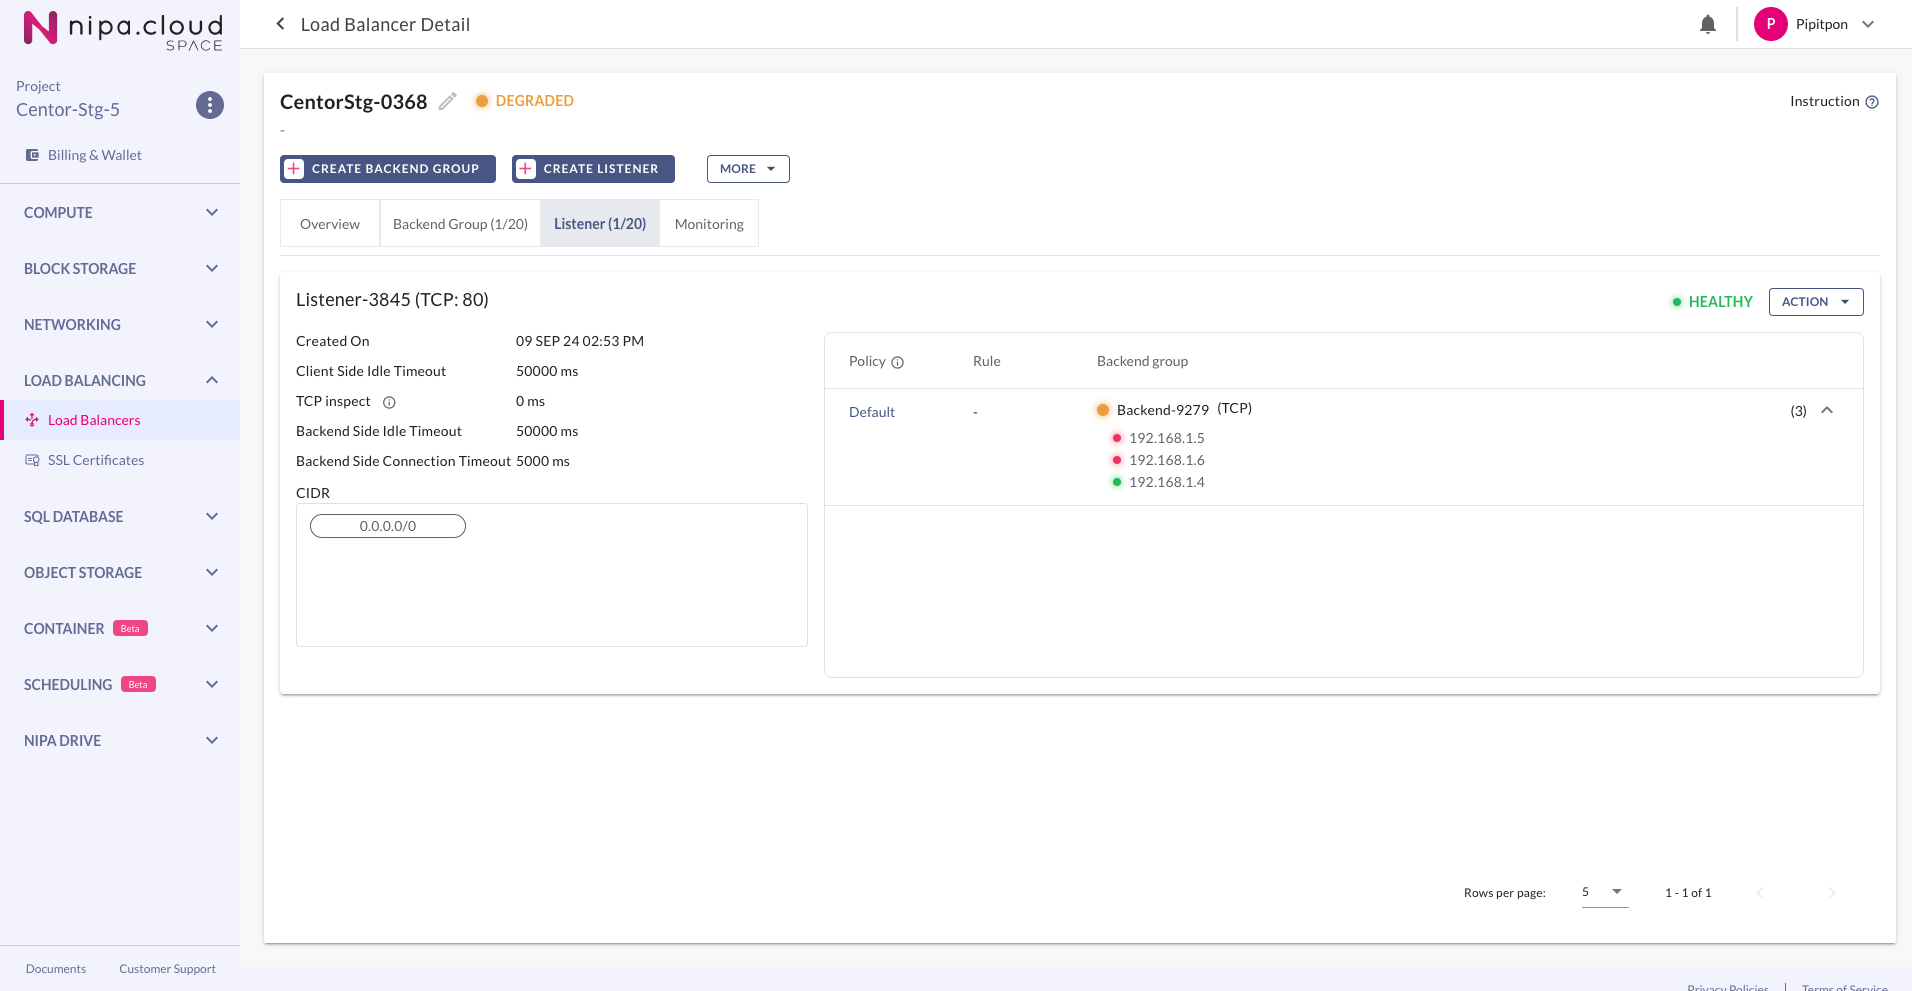
Wait until the Load Balancer's status is no longer "Updating." The setup is now complete. At this point, if traffic arrives at this Load Balancer's VIP or External IP on the same port as the newly created listener, it will be forwarded to one of the members of the associated Backend Group according to the selected algorithm.

Last updated
Was this helpful?