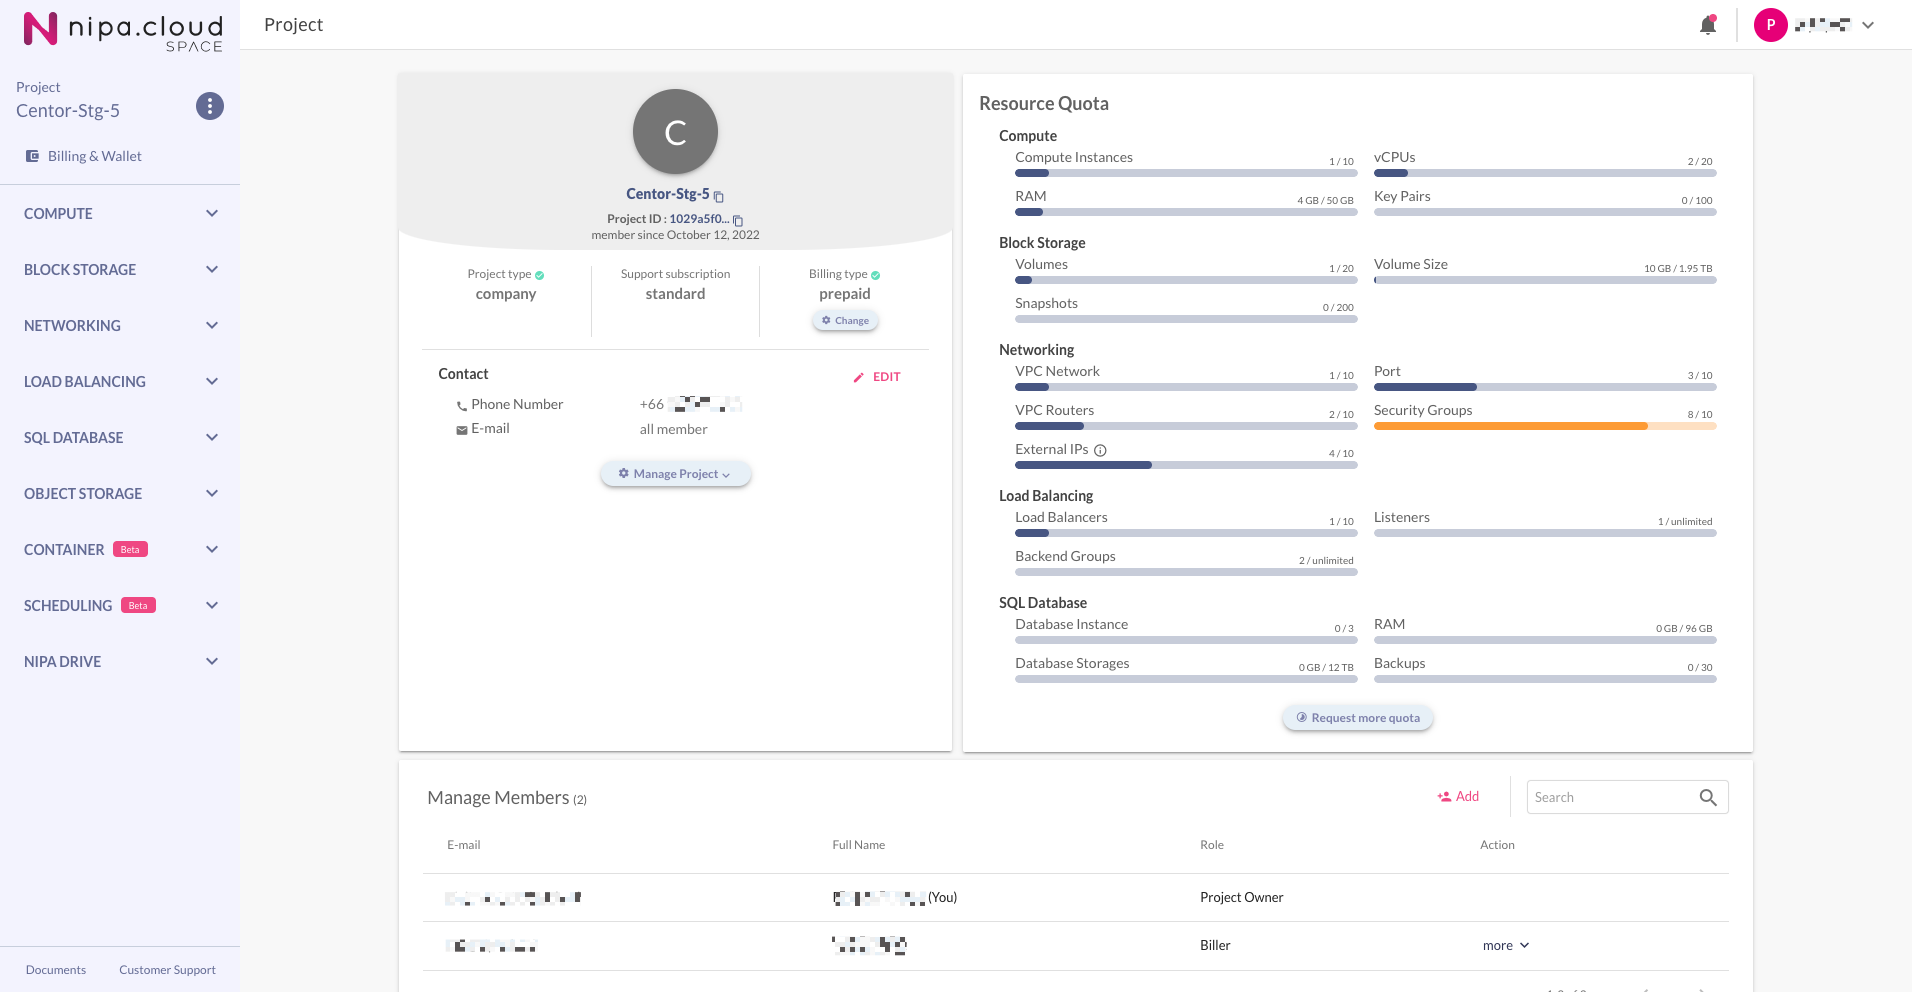
# Create Load Balancer

## Prerequisite

* The project's wallet balance must be greater than 0 ([see how to top up a project's wallet](https://docs-epc.gitbook.io/ncs-documents/ncs-documents-en/nipa-cloud-space-overview/billing-and-wallet/topup-a-project-wallet)).

## Instructions

### 1. **Enter the Project**

Select a project from the Projects Management page to go to its Project Detail page.

<figure><img src="https://content.gitbook.com/content/4csDFrNQz0Q4tDnx3xyT/blobs/GnDuWruQL2TZcIPsnOaB/image.png" alt=""><figcaption><p>Project Detail</p></figcaption></figure>

### 2. **Select the "Create Load Balancer" Command**

Go to the Load Balancer page by clicking the **Load Balancing > Load Balancer** menu in the sidebar. Then, click the **"Load Balancer"** button in the top-right corner.

<figure><img src="https://content.gitbook.com/content/4csDFrNQz0Q4tDnx3xyT/blobs/LUxiZoNTDa4pfR3x0I4b/image.png" alt=""><figcaption><p>
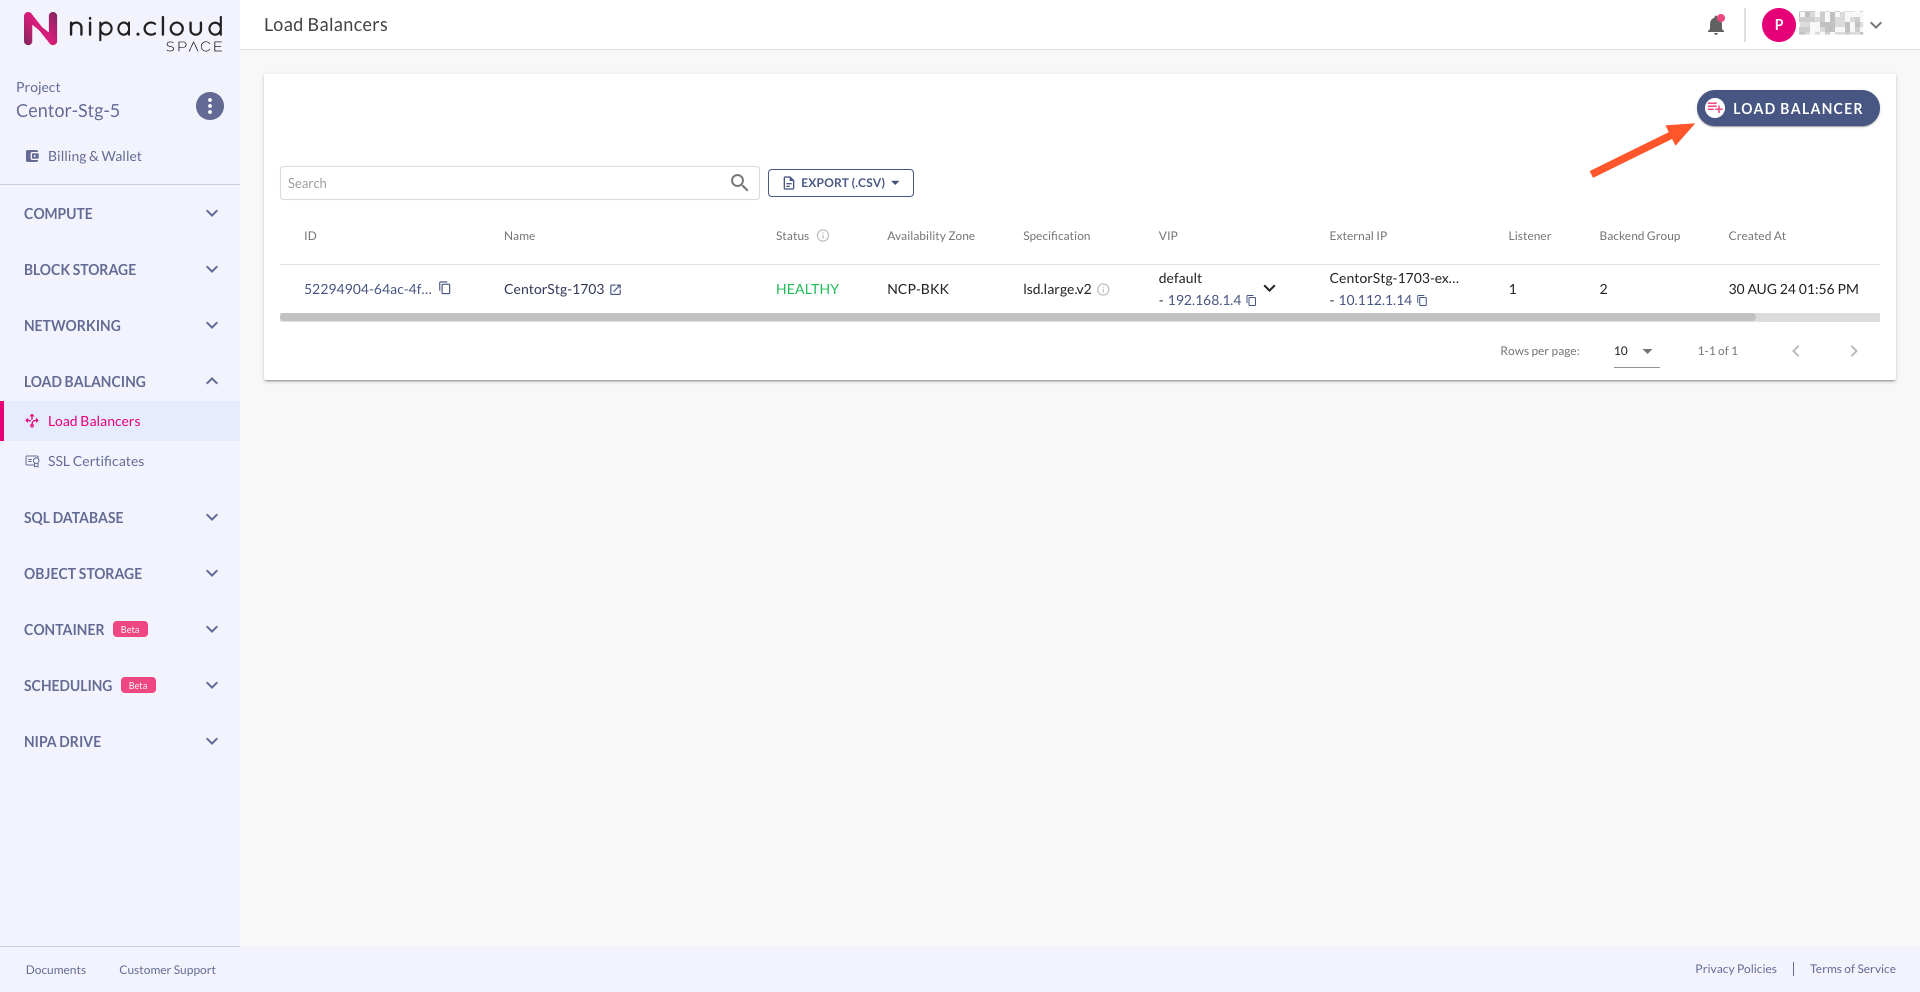
Load Balancer Create Button</p></figcaption></figure>

### 3. **Choose the Availability Zone, Name, and Description**

In the first step ("Detail"), select an **Availability Zone**, and provide a **Name** and **Description** for the Load Balancer to distinguish it from others.

{% hint style="info" %}
It is recommended that the Load Balancer and the Compute Instances that will be members of its backend groups are in the same Availability Zone for optimal performance.
{% endhint %}

<figure><img src="https://content.gitbook.com/content/4csDFrNQz0Q4tDnx3xyT/blobs/vutfaFnlzprlvQIpAEkx/image.png" alt=""><figcaption><p>
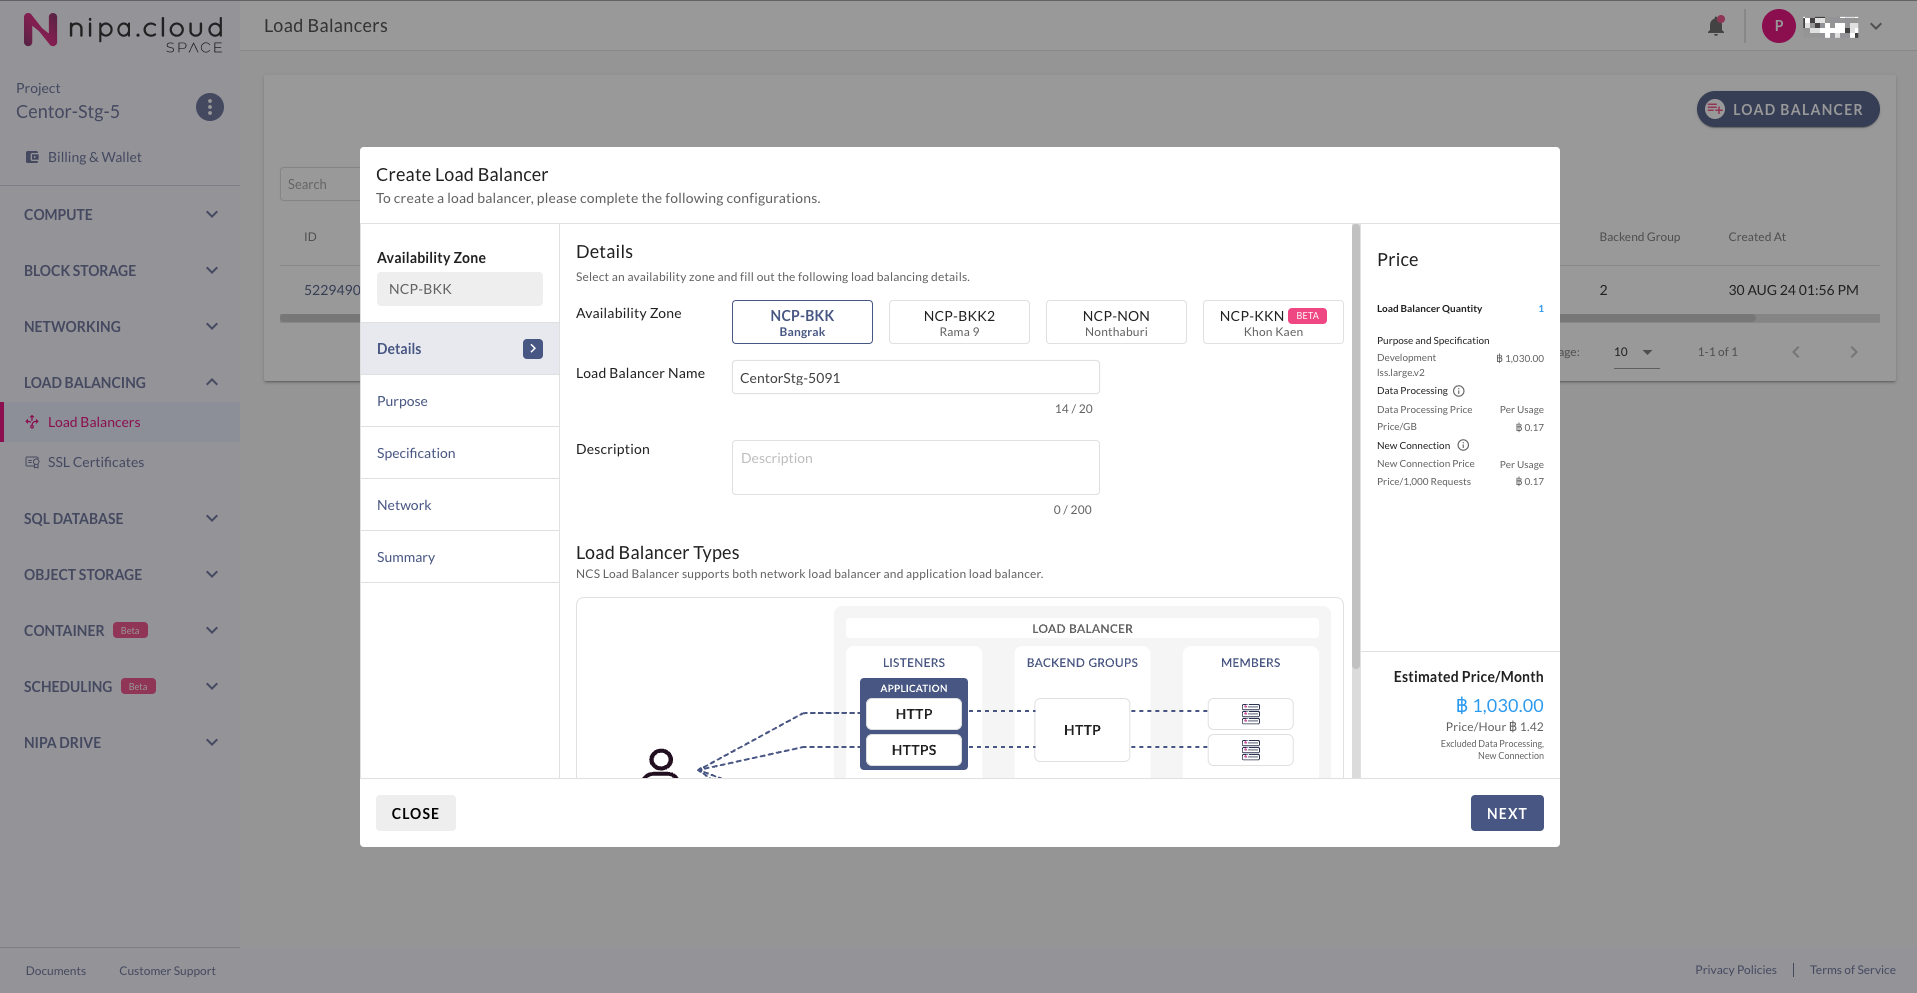
Create Load Balancer - Detail</p></figcaption></figure>

### 4. **Select the Load Balancer's Purpose**

Choose the purpose based on your use case:

* **Development:** Suitable for workloads that can tolerate slight performance variations or for test environments. Only available with a Standalone topology.
* **Production:** Suitable for workloads requiring stable, consistent performance. Available in both Standalone and High Availability topologies.

<figure><img src="https://content.gitbook.com/content/4csDFrNQz0Q4tDnx3xyT/blobs/JrVJADNnhPJAvHQpqytl/image.png" alt=""><figcaption><p>
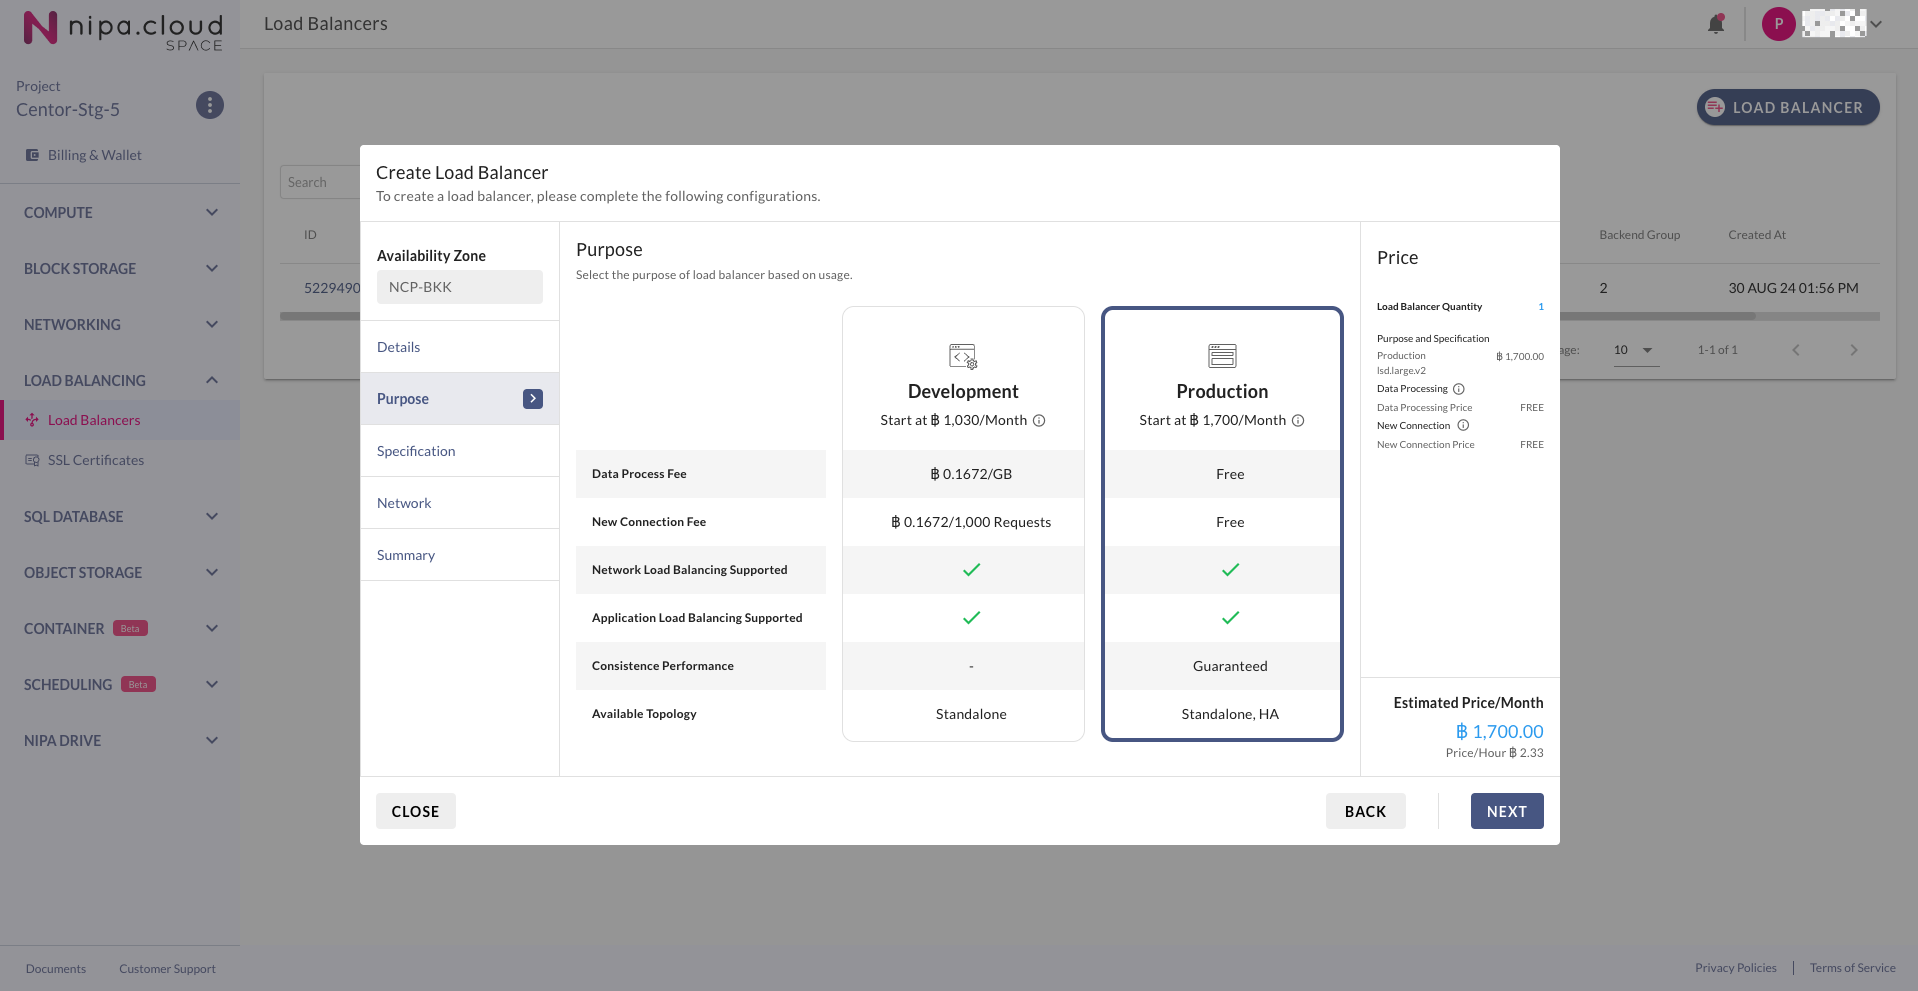
Create Load Balancer - Purpose</p></figcaption></figure>

### 5. **Select the Load Balancer's Specification**

Choose the **Topology** and **Specification** (size) based on your workload requirements and downtime tolerance.

**Topology** specifies the number of compute machines:

* **Standalone:** A single compute machine. If it fails, a self-healing process will bring a new one online within 5 minutes.
* **High Availability:** Two compute machines in an active/standby configuration. If the active machine fails, it can switch to the standby machine within 5 seconds.

<figure><img src="https://content.gitbook.com/content/4csDFrNQz0Q4tDnx3xyT/blobs/M7li7G22mL1EBn75631H/image.png" alt=""><figcaption><p>Create Load Balancer - Specification</p></figcaption></figure>

### 6. **Select the Virtual Network and External Network**

Choose a **VPC Network** to be the Load Balancer's virtual network. Also, select an **External IP** if you require public internet access.

{% hint style="info" %}
It is recommended that the Load Balancer uses the same VPC Network as the Compute Instances that will be its backend members.
{% endhint %}

<figure><img src="https://content.gitbook.com/content/4csDFrNQz0Q4tDnx3xyT/blobs/TVO6puduqK0j5Bzwimhv/image.png" alt=""><figcaption><p>
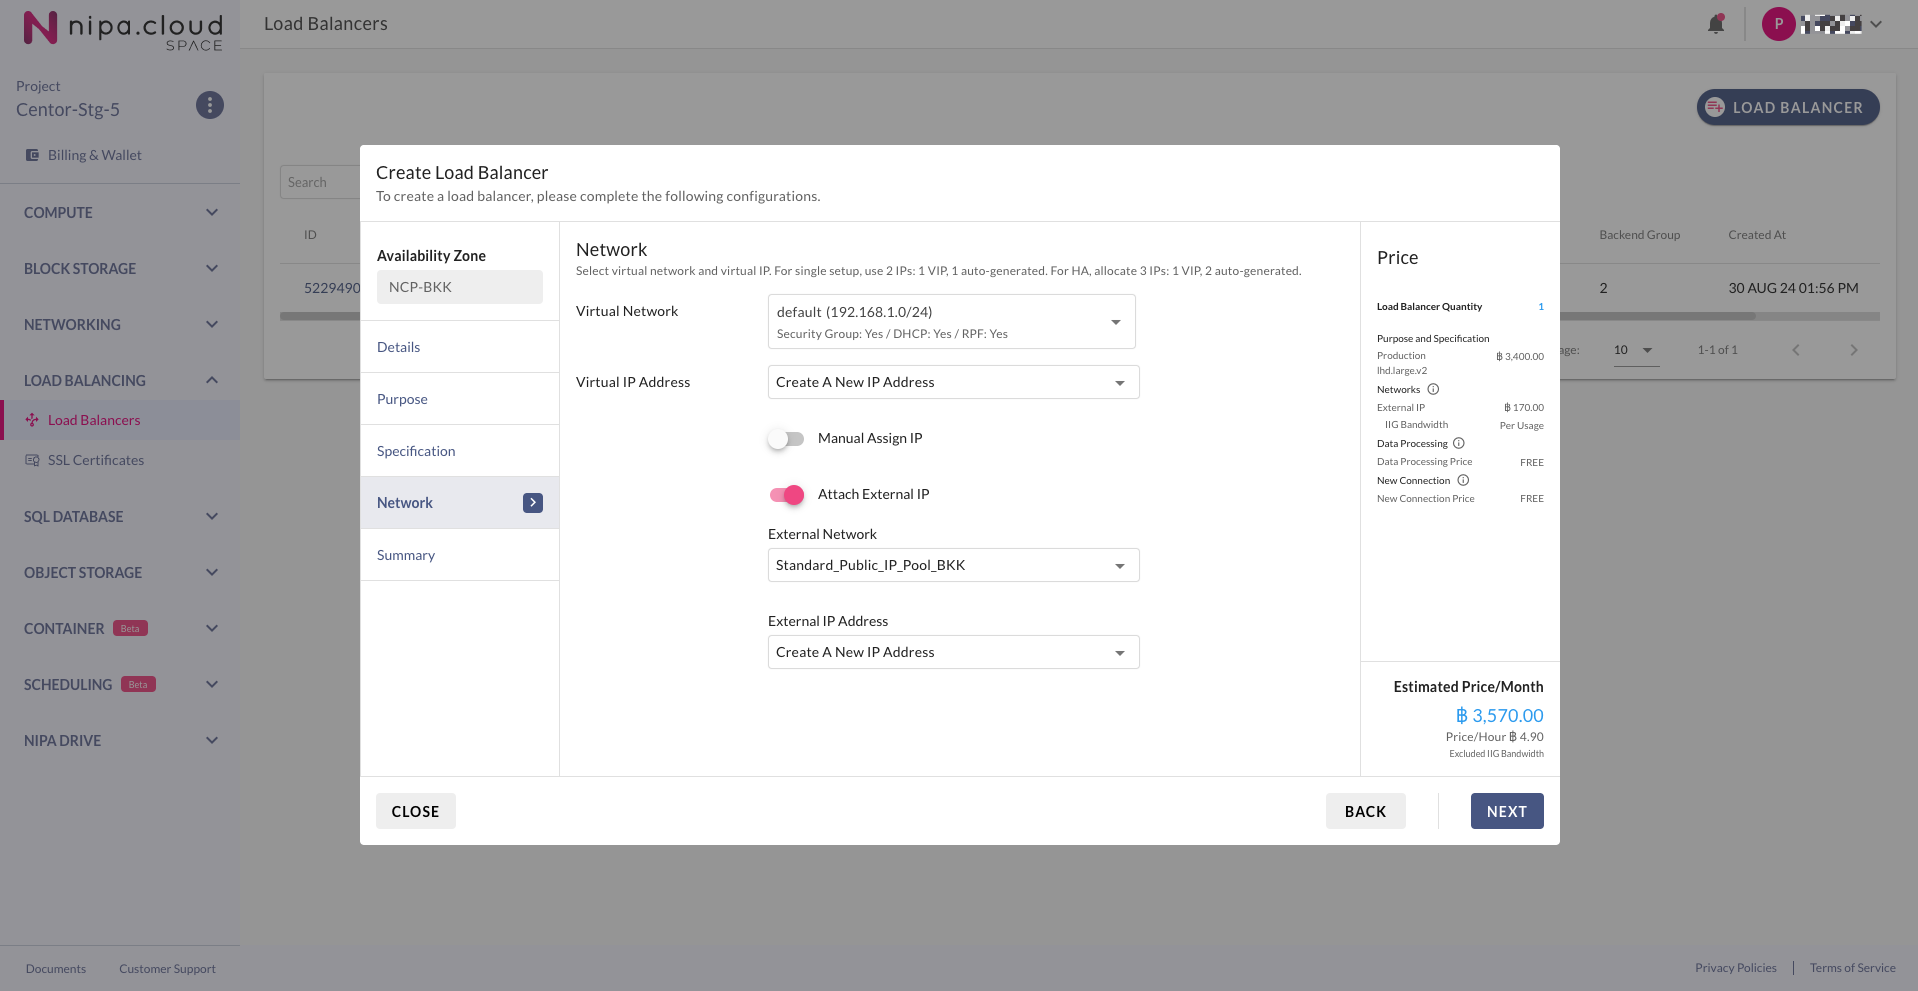
Create Load Balancer - Network</p></figcaption></figure>

### 7. **Review the Configuration and Confirm Creation**

Verify the accuracy of your settings and click the **CREATE** button to create the Load Balancer.

<figure><img src="https://content.gitbook.com/content/4csDFrNQz0Q4tDnx3xyT/blobs/LKcIJGy9HUAidI2Z8f0m/image.png" alt=""><figcaption><p>
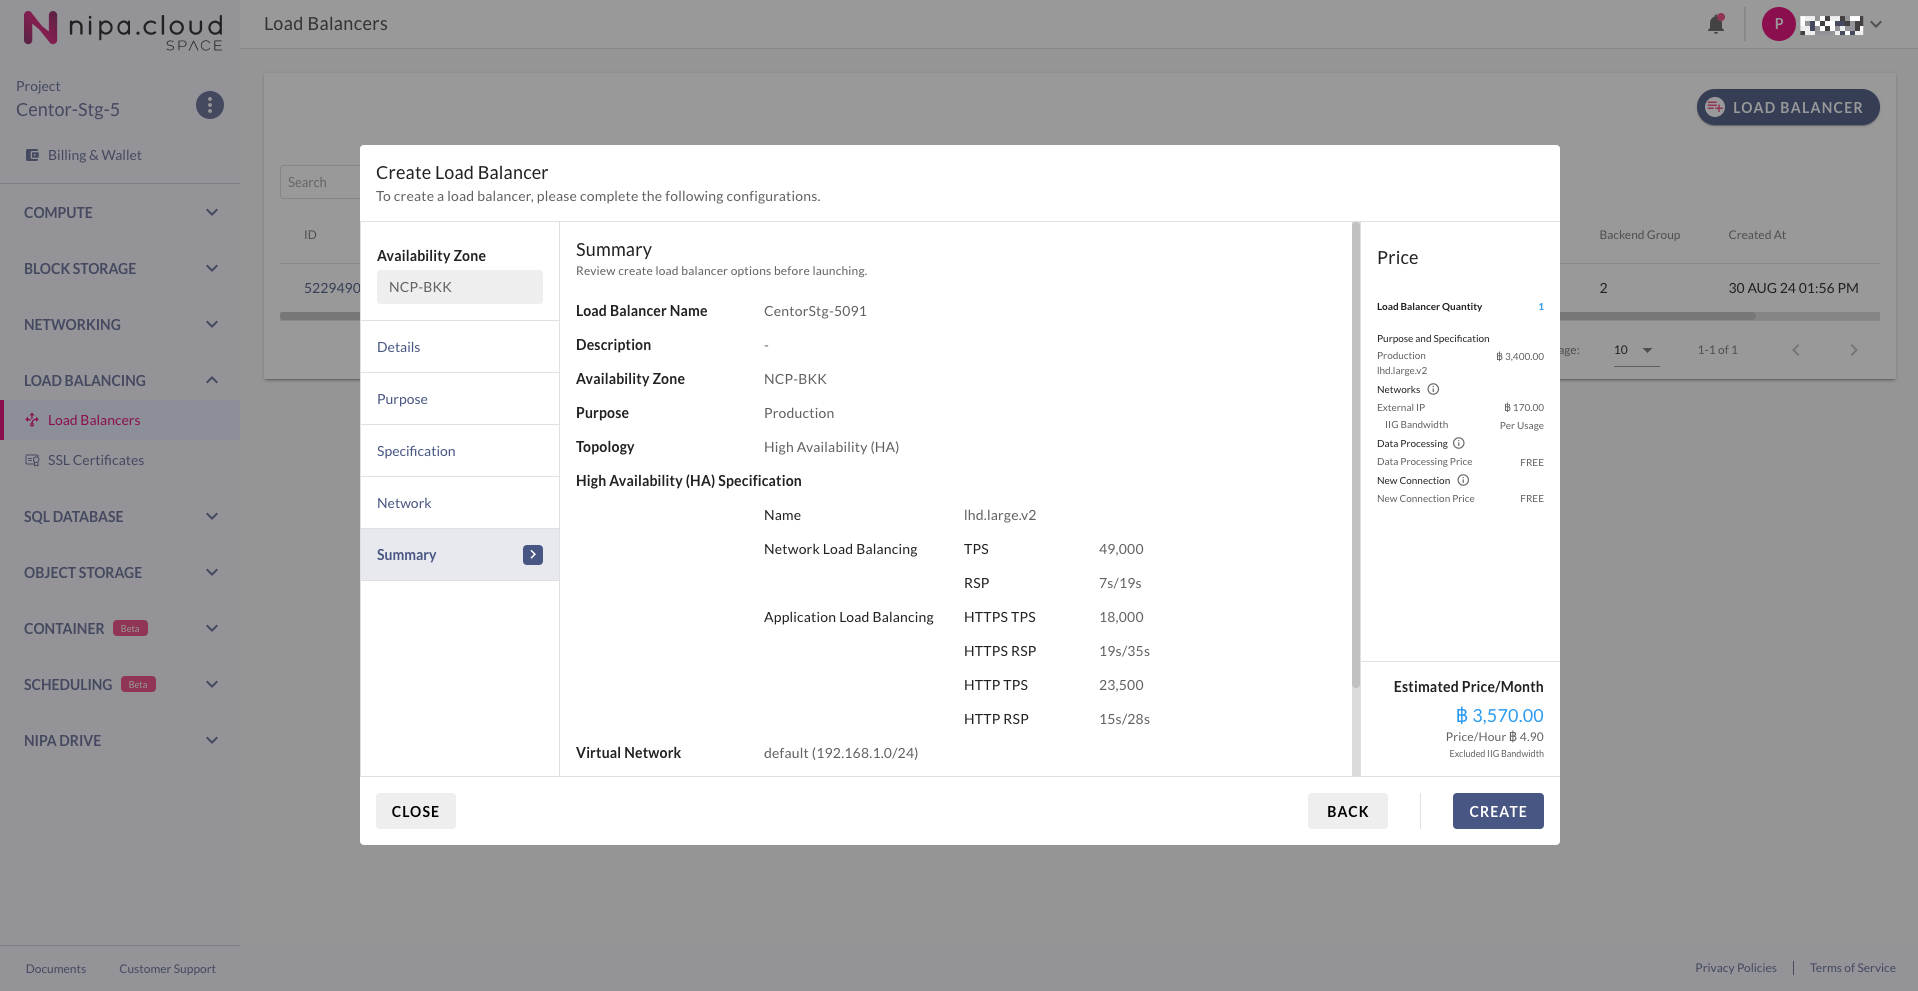
Create Load Balancer - Summary
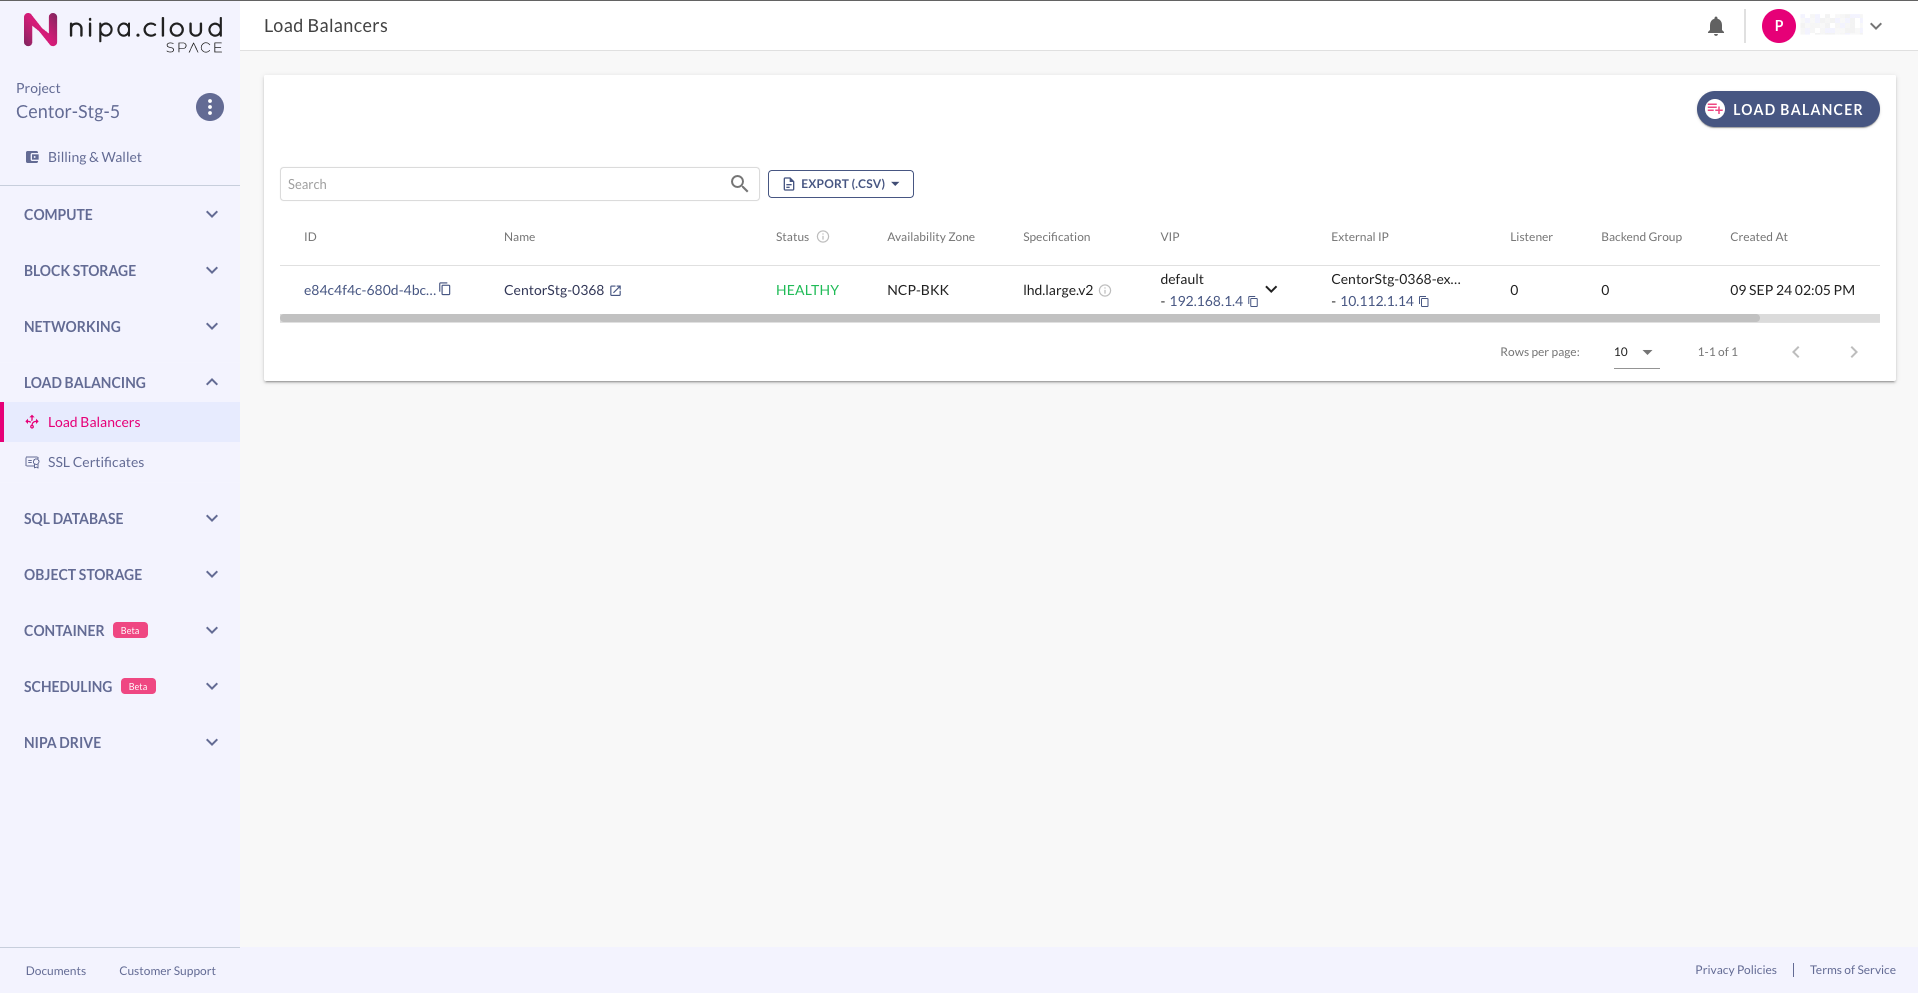
</p></figcaption></figure>

### 9. **View the Details of the Created Load Balancer**

Wait until the Load Balancer Status becomes **HEALTHY**, then click on its name to go to the Load Balancer Detail page.

<figure><img src="https://content.gitbook.com/content/4csDFrNQz0Q4tDnx3xyT/blobs/HYKNKnf6JCBoGJApUhfz/image.png" alt=""><figcaption><p>Load Balancer List</p></figcaption></figure>

### 10. **Create a Backend Group**

On the Load Balancer Detail page, under the "Overview" tab, you will see the Load Balancer's details. You must create a Backend Group to start using it. Click the **CREATE BACKEND GROUP** button in the top menu bar or in the instruction card on the top right.

<figure><img src="https://content.gitbook.com/content/4csDFrNQz0Q4tDnx3xyT/blobs/OW46FmAjfajSQFiTkjcT/image.png" alt=""><figcaption><p>
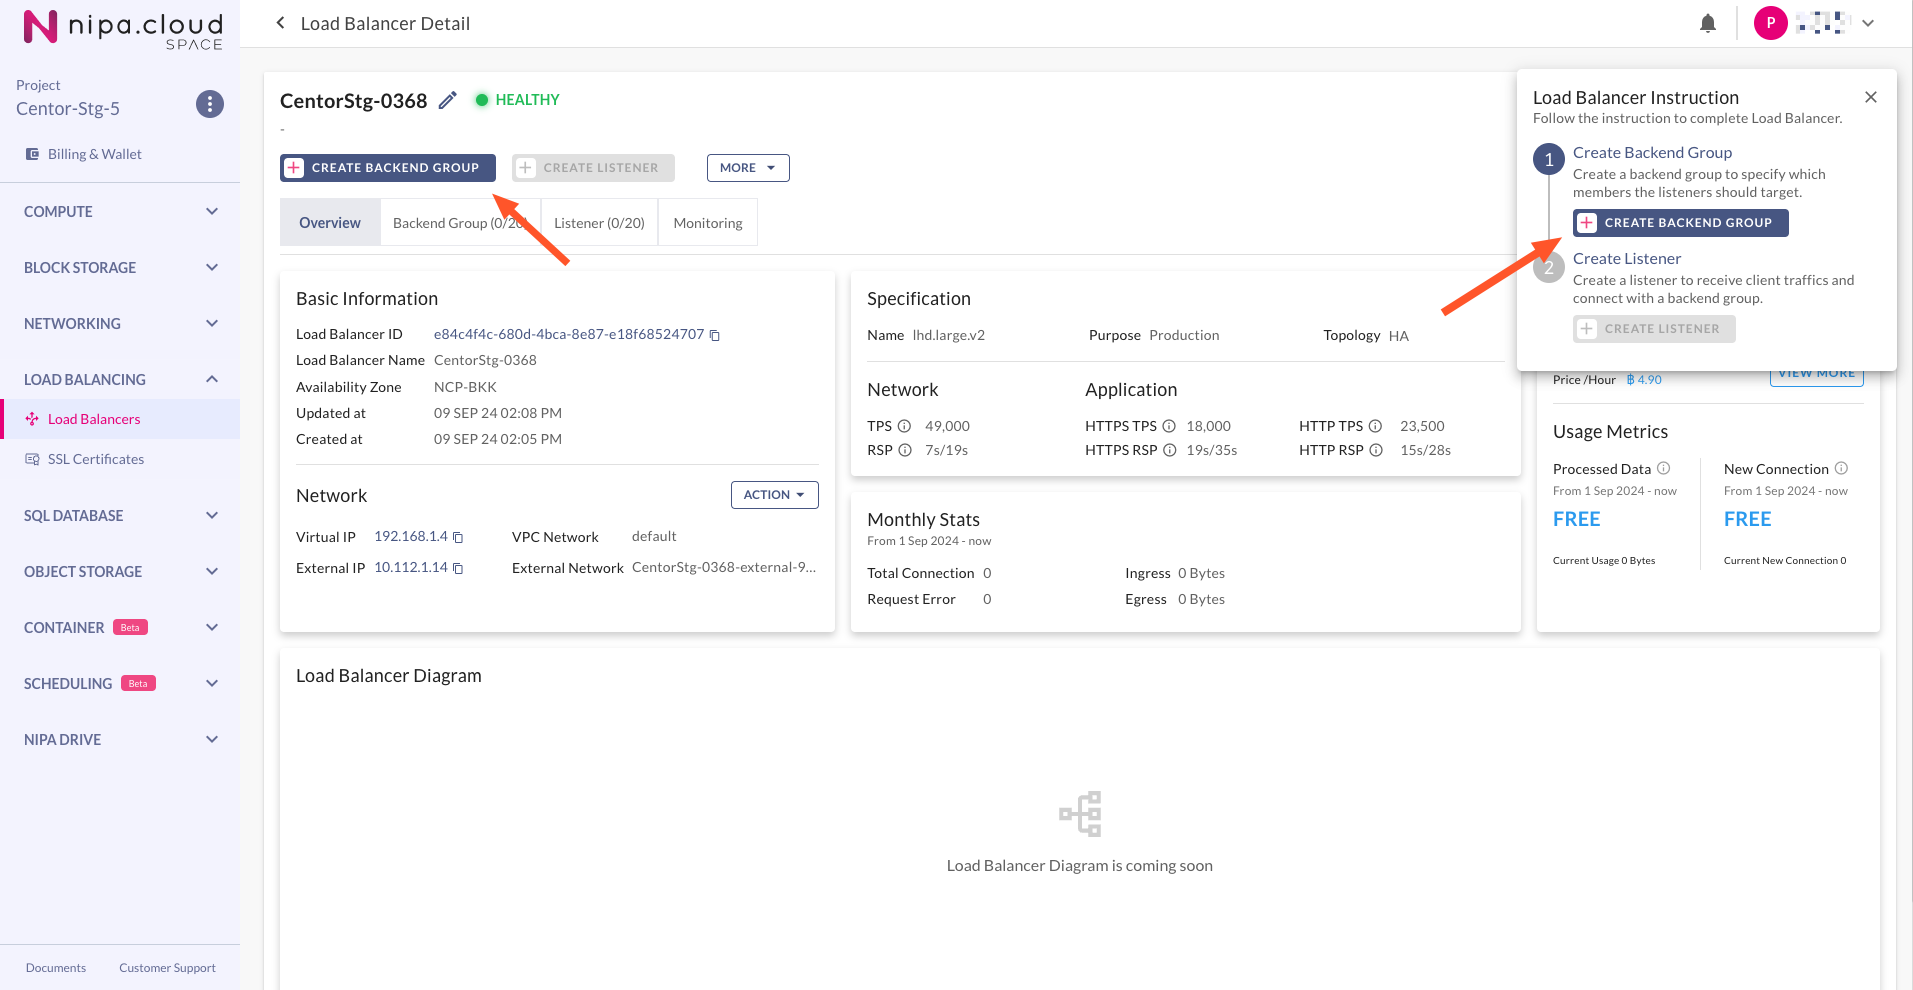
Load Balancer Overview - Create Backend Group Button</p></figcaption></figure>

From this point, the steps will diverge depending on whether you want to configure a **Network Load Balancer** or an **Application Load Balancer**. Please choose from the options below:

* [I want to use Network Load Balancing](https://docs-epc.gitbook.io/ncs-documents/ncs-documents-en/load-balancing/load-balancer/..#network-load-balancing)
* [I want to use Application Load Balancing](https://docs-epc.gitbook.io/ncs-documents/ncs-documents-en/load-balancing/load-balancer/..#application-load-balancing)
