Share Image to Between Projects
Images can be shared for use with other projects on NIPA Cloud Space. The project that owns the image retains full control over the image and its sharing permissions.
Prerequisite
The project's wallet balance must be greater than 0 (see how to top up a project's wallet).
You must own at least one image in your project (see how to create an image from a bootable volume or how to import an image).
Instructions
The process involves two main steps: sharing the image and receiving the image.
Steps to Share an Image
1. Log in to the project
Select the project that owns the image from the projects management page.

2. Go to the Image list page
In the left-hand menu, click COMPUTE > Image.

3. Select the image to share
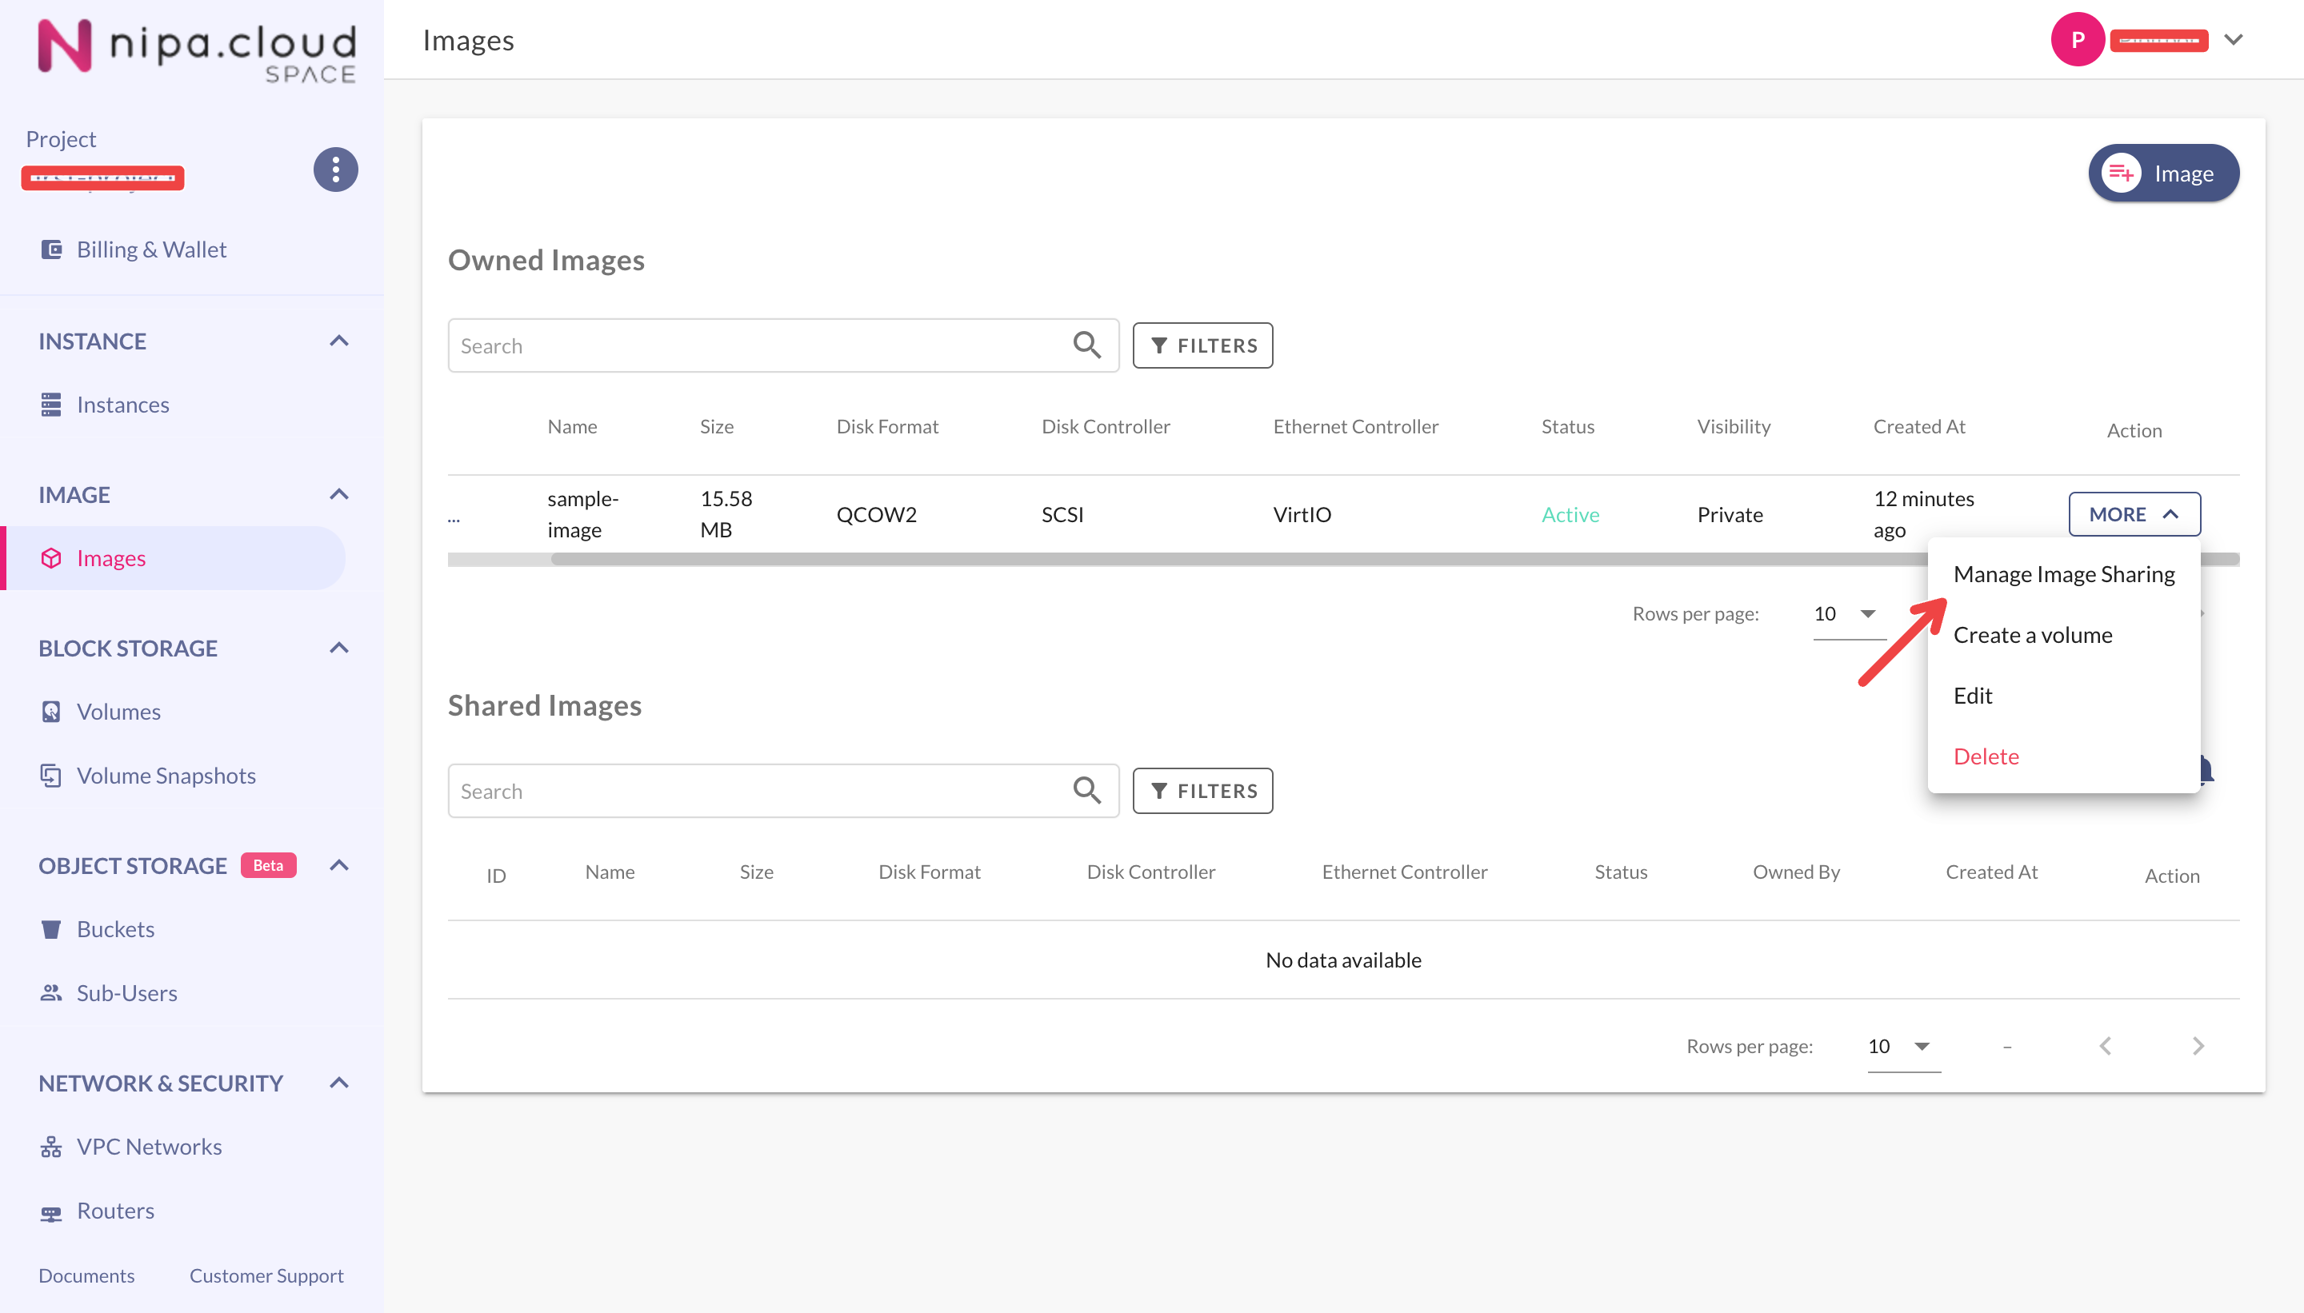
Choose an image that has an Active status.
Click the MORE button and select "Manage Image Sharing". The "Manage Image Sharing" window will appear.

4. Share the image with another project
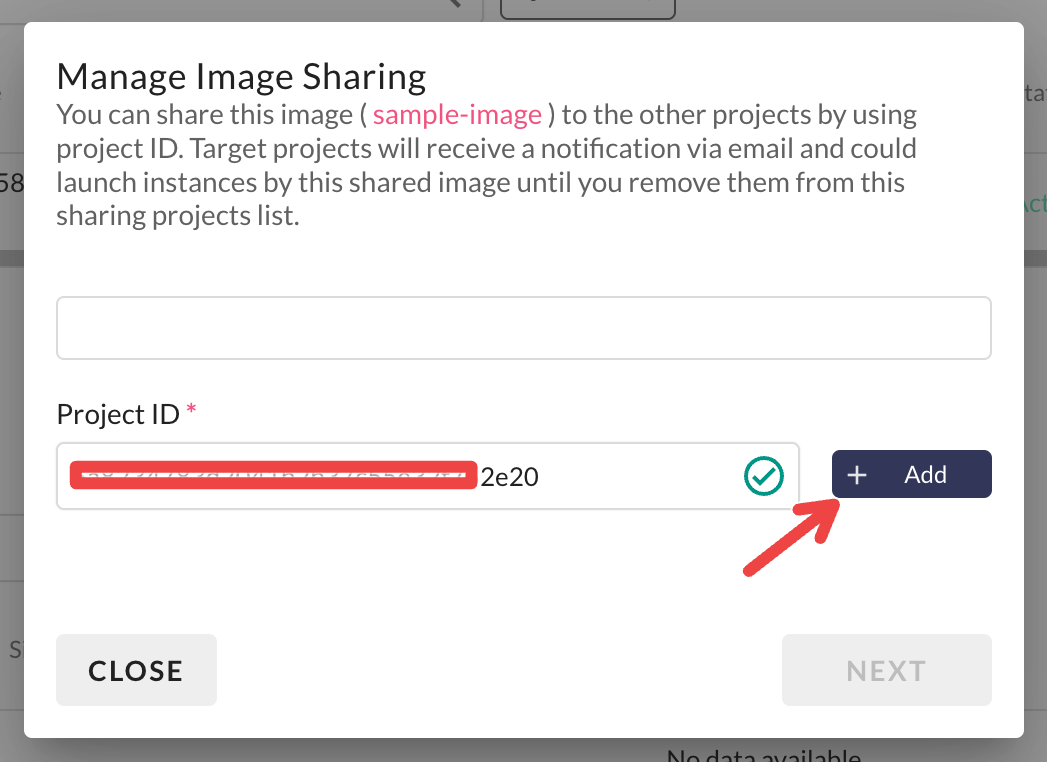
In the "Manage Image Sharing" menu, enter the Project ID of the project you want to share the image with and click add.
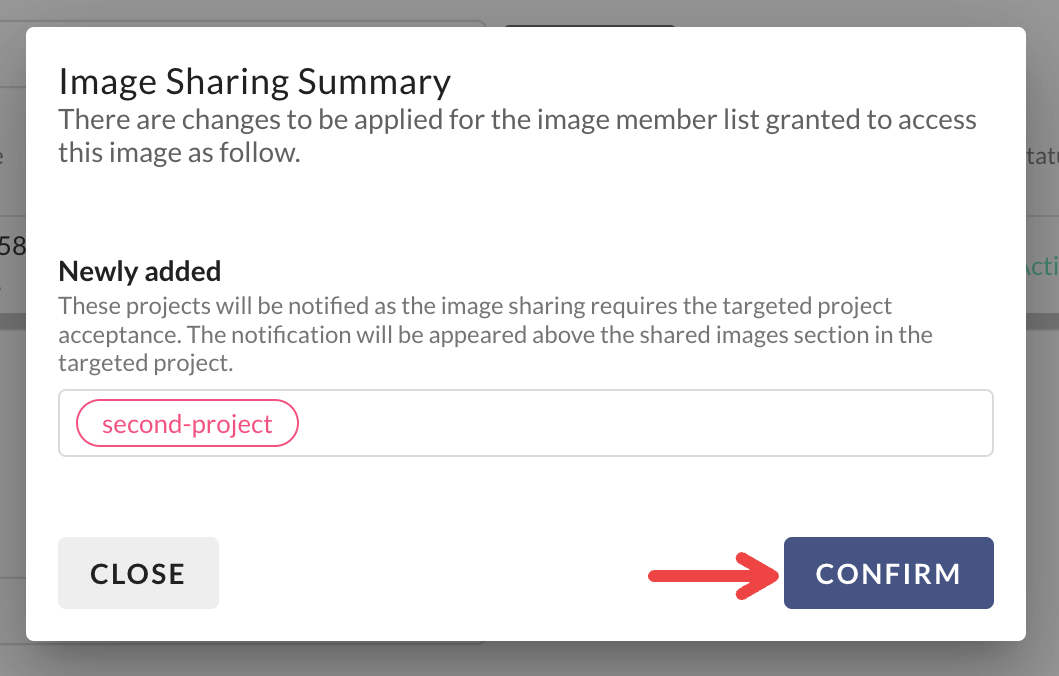
Once you are done adding projects, click next to review the summary, then click confirm to send a sharing notification to the selected project(s).


Steps to Receive a Shared Image
1. Log in to the project
Select the project that is intended to receive the image from the projects management page.

2. Go to the Image list page
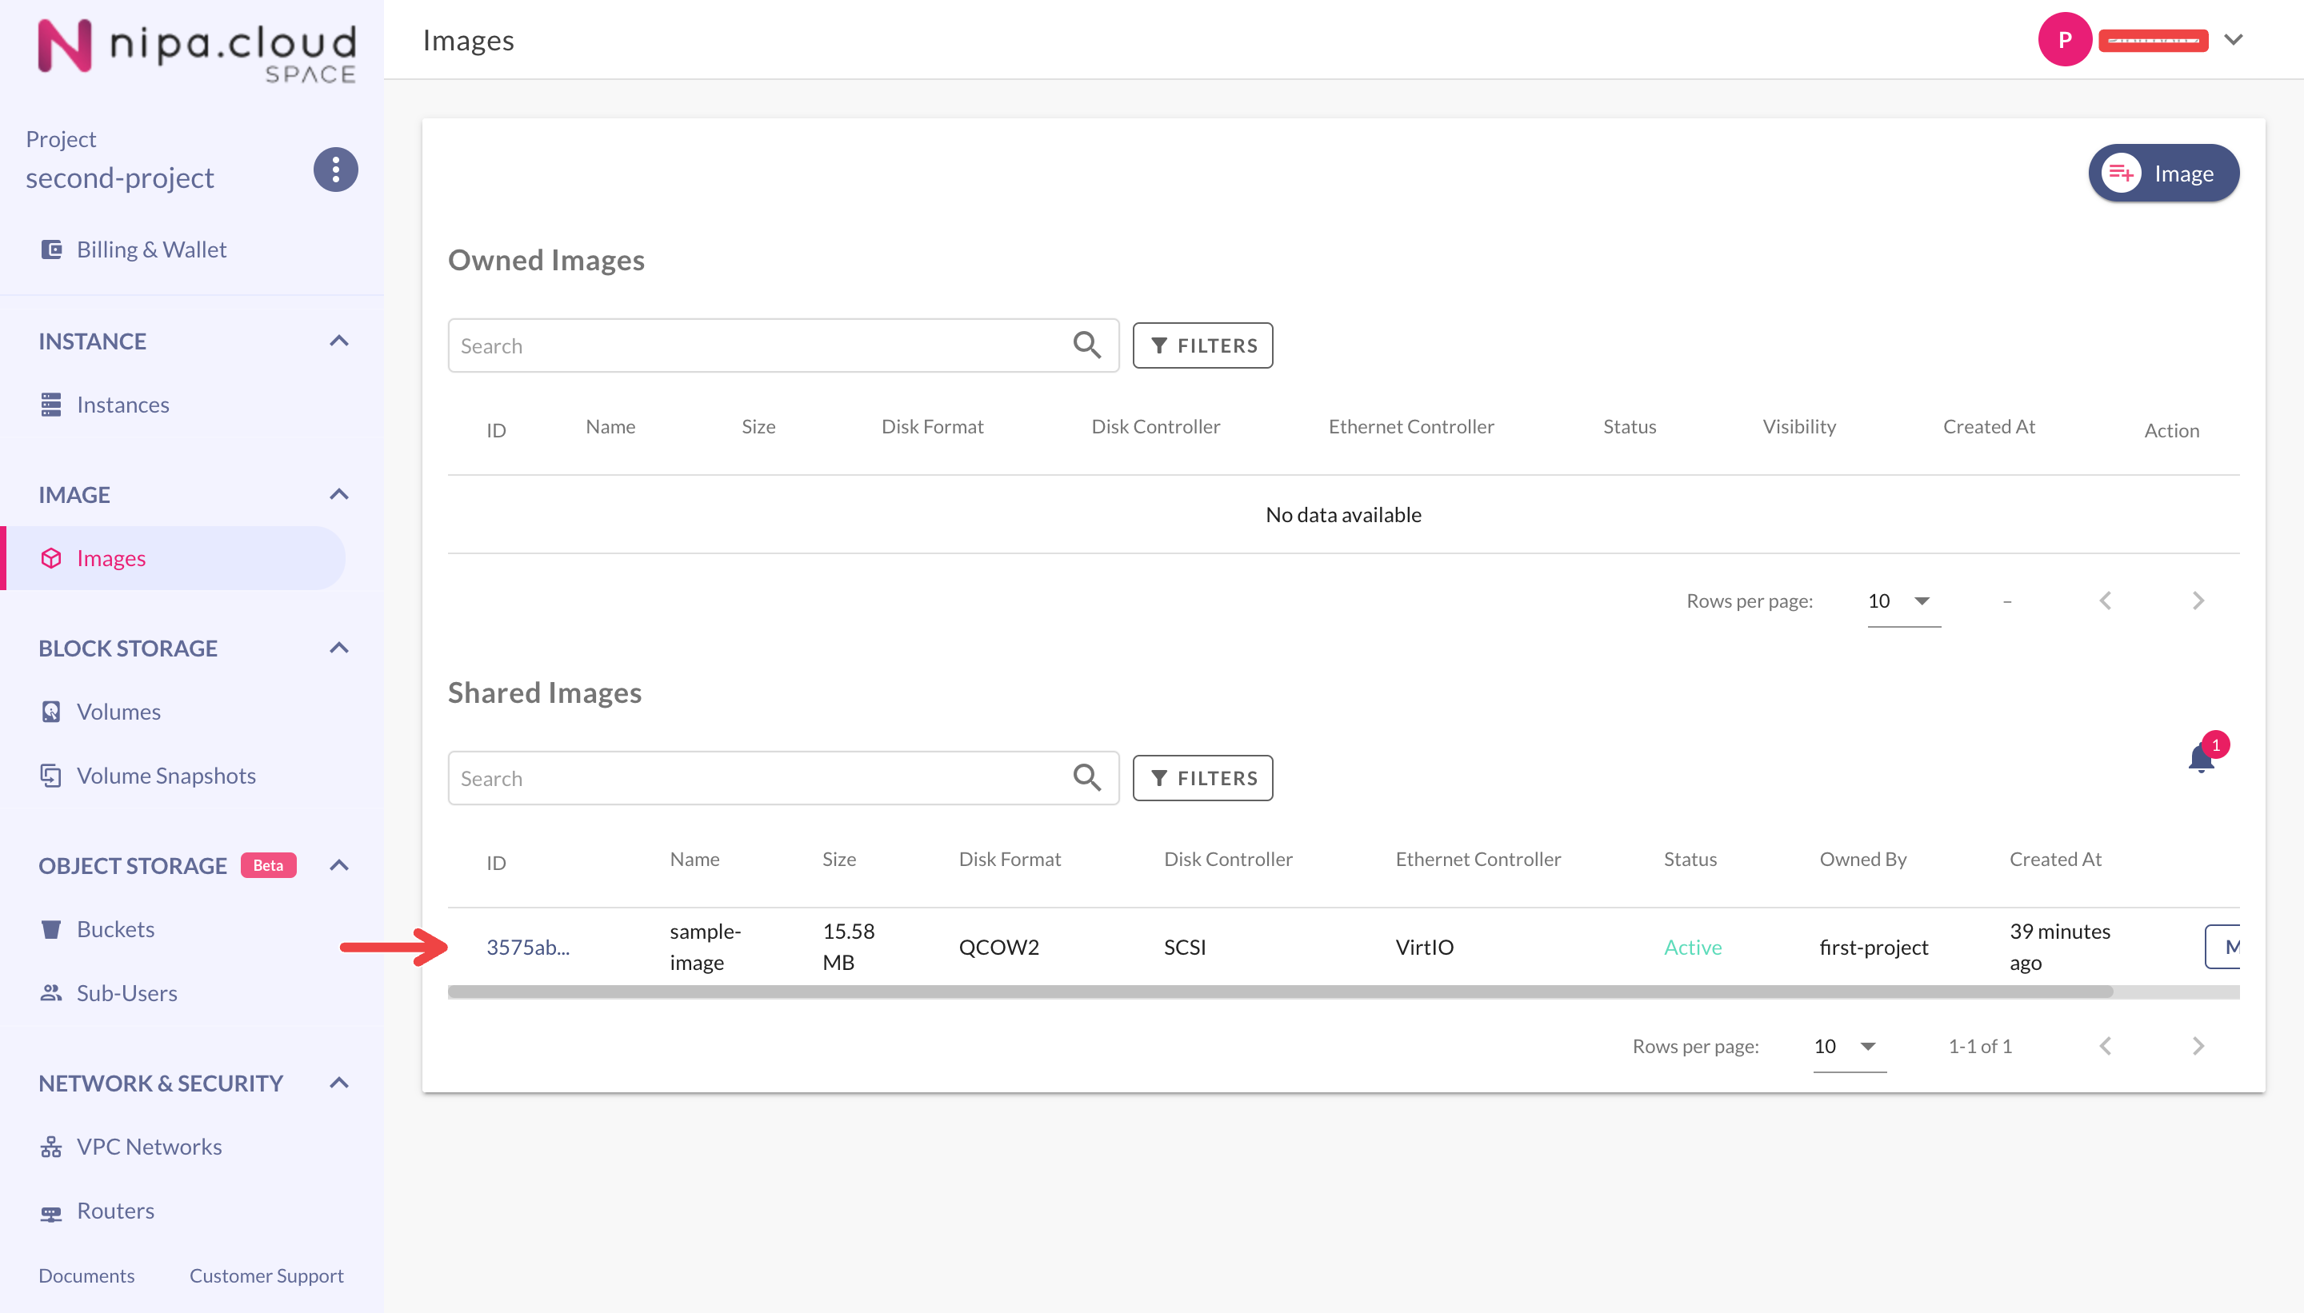
In the left-hand menu, click COMPUTE > Image. You will see a notification in the "Shared Images" table.

3. Accept the image share
Click on the notification to view the list of images shared with your project.
Click accept to receive the image sharing invitation.


The image will now appear in your "Shared Images" table and can be used immediately to launch instances or create volumes without incurring any storage costs for the image itself.
Last updated
Was this helpful?