# Manage Project Member
## Prerequisite
* A registered account in NIPA Cloud Space (see [account creation](https://docs-epc.gitbook.io/ncs-documents/ncs-documents-en/nipa-cloud-space-overview/ncs-user-account/create-nipa-cloud-space-account)).
* Be logged into the NIPA Cloud Space system (see [login](https://docs-epc.gitbook.io/ncs-documents/ncs-documents-en/nipa-cloud-space-overview/ncs-user-account/loging-in-to-nipa-cloud-space)).
* You must have the **Project Owner** role for the project (see [project creation](https://docs-epc.gitbook.io/ncs-documents/ncs-documents-en/nipa-cloud-space-overview/co-working-projects/create-co-working-project)).
## Instructions
### Invite Project Member
### 1. **Enter the Project**
Select the desired project from the Projects Management page to go to its Project Detail page.
Project Detail Page
### 2. Invite Project Member
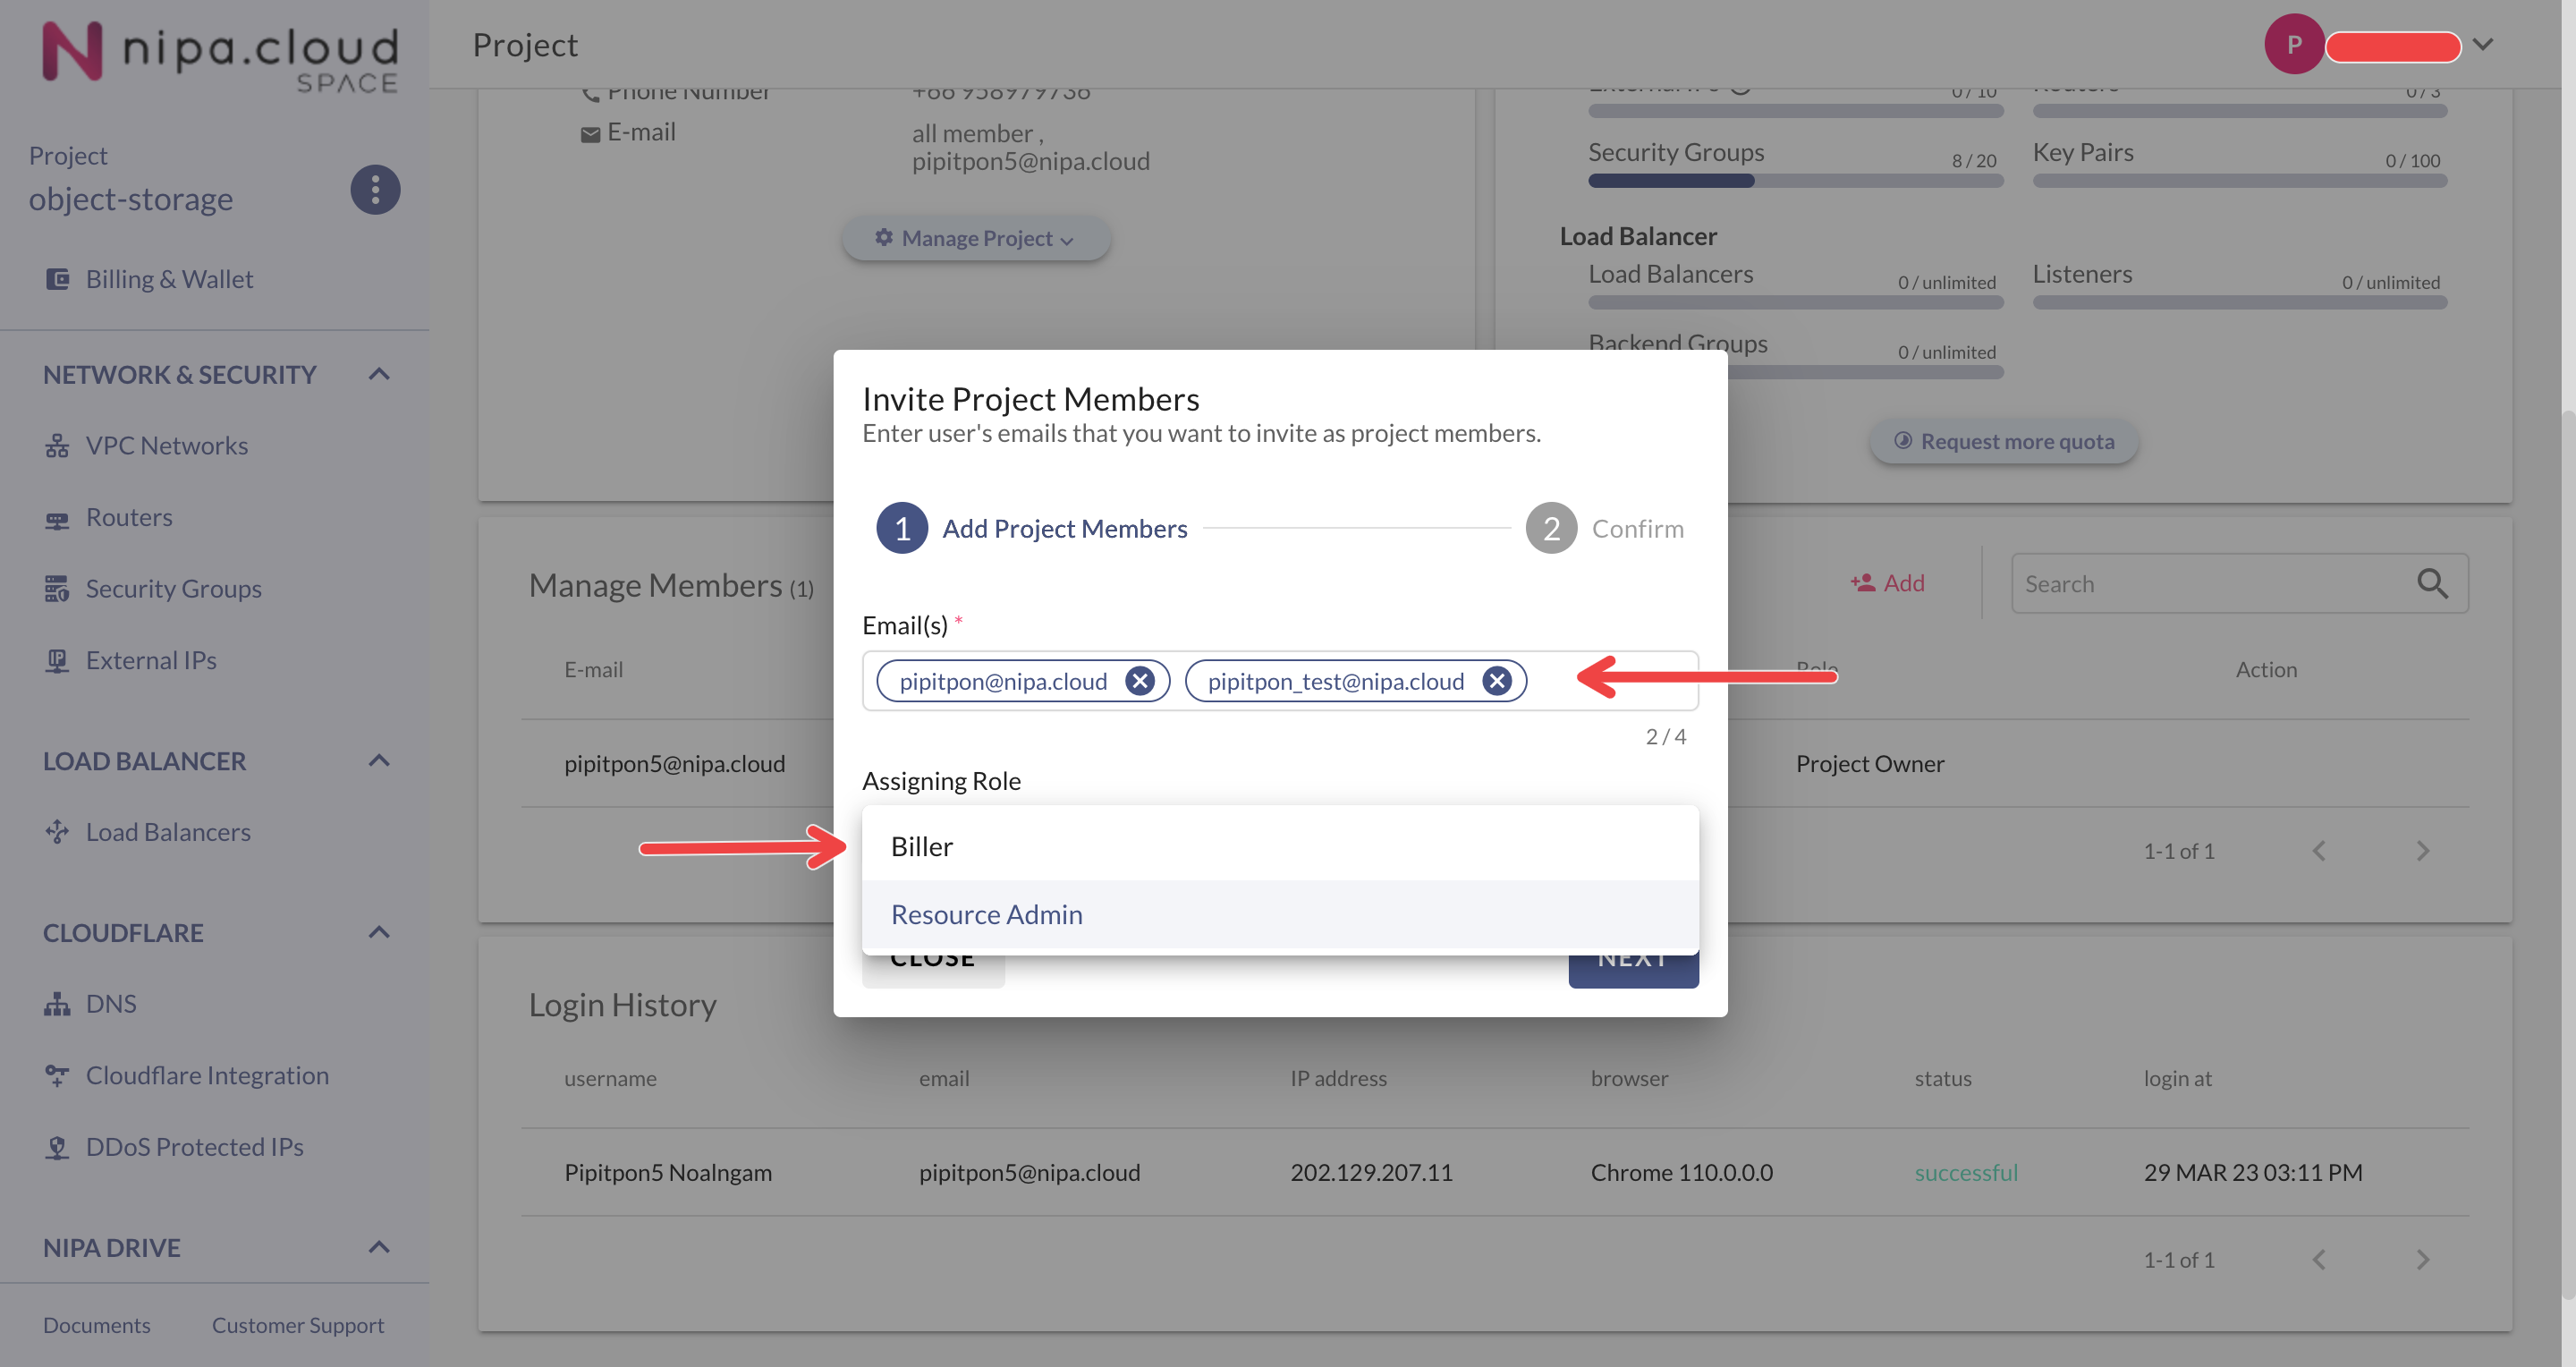
Only users with the **Project Owner** role can invite new members. You can invite users to the **Biller** or **Resource Admin** roles.
* **Resource Admin:** Has permissions to manage all resources within the Project but cannot manage members or the project's budget.
* **Biller:** Has the same permissions as a Resource Admin, with the additional ability to manage the project's budget via the Billing & Wallet page.
* **Project Owner:** This role is assigned exclusively to the user who created the Project. It encompasses all permissions of the other roles, plus the ability to manage Project members.
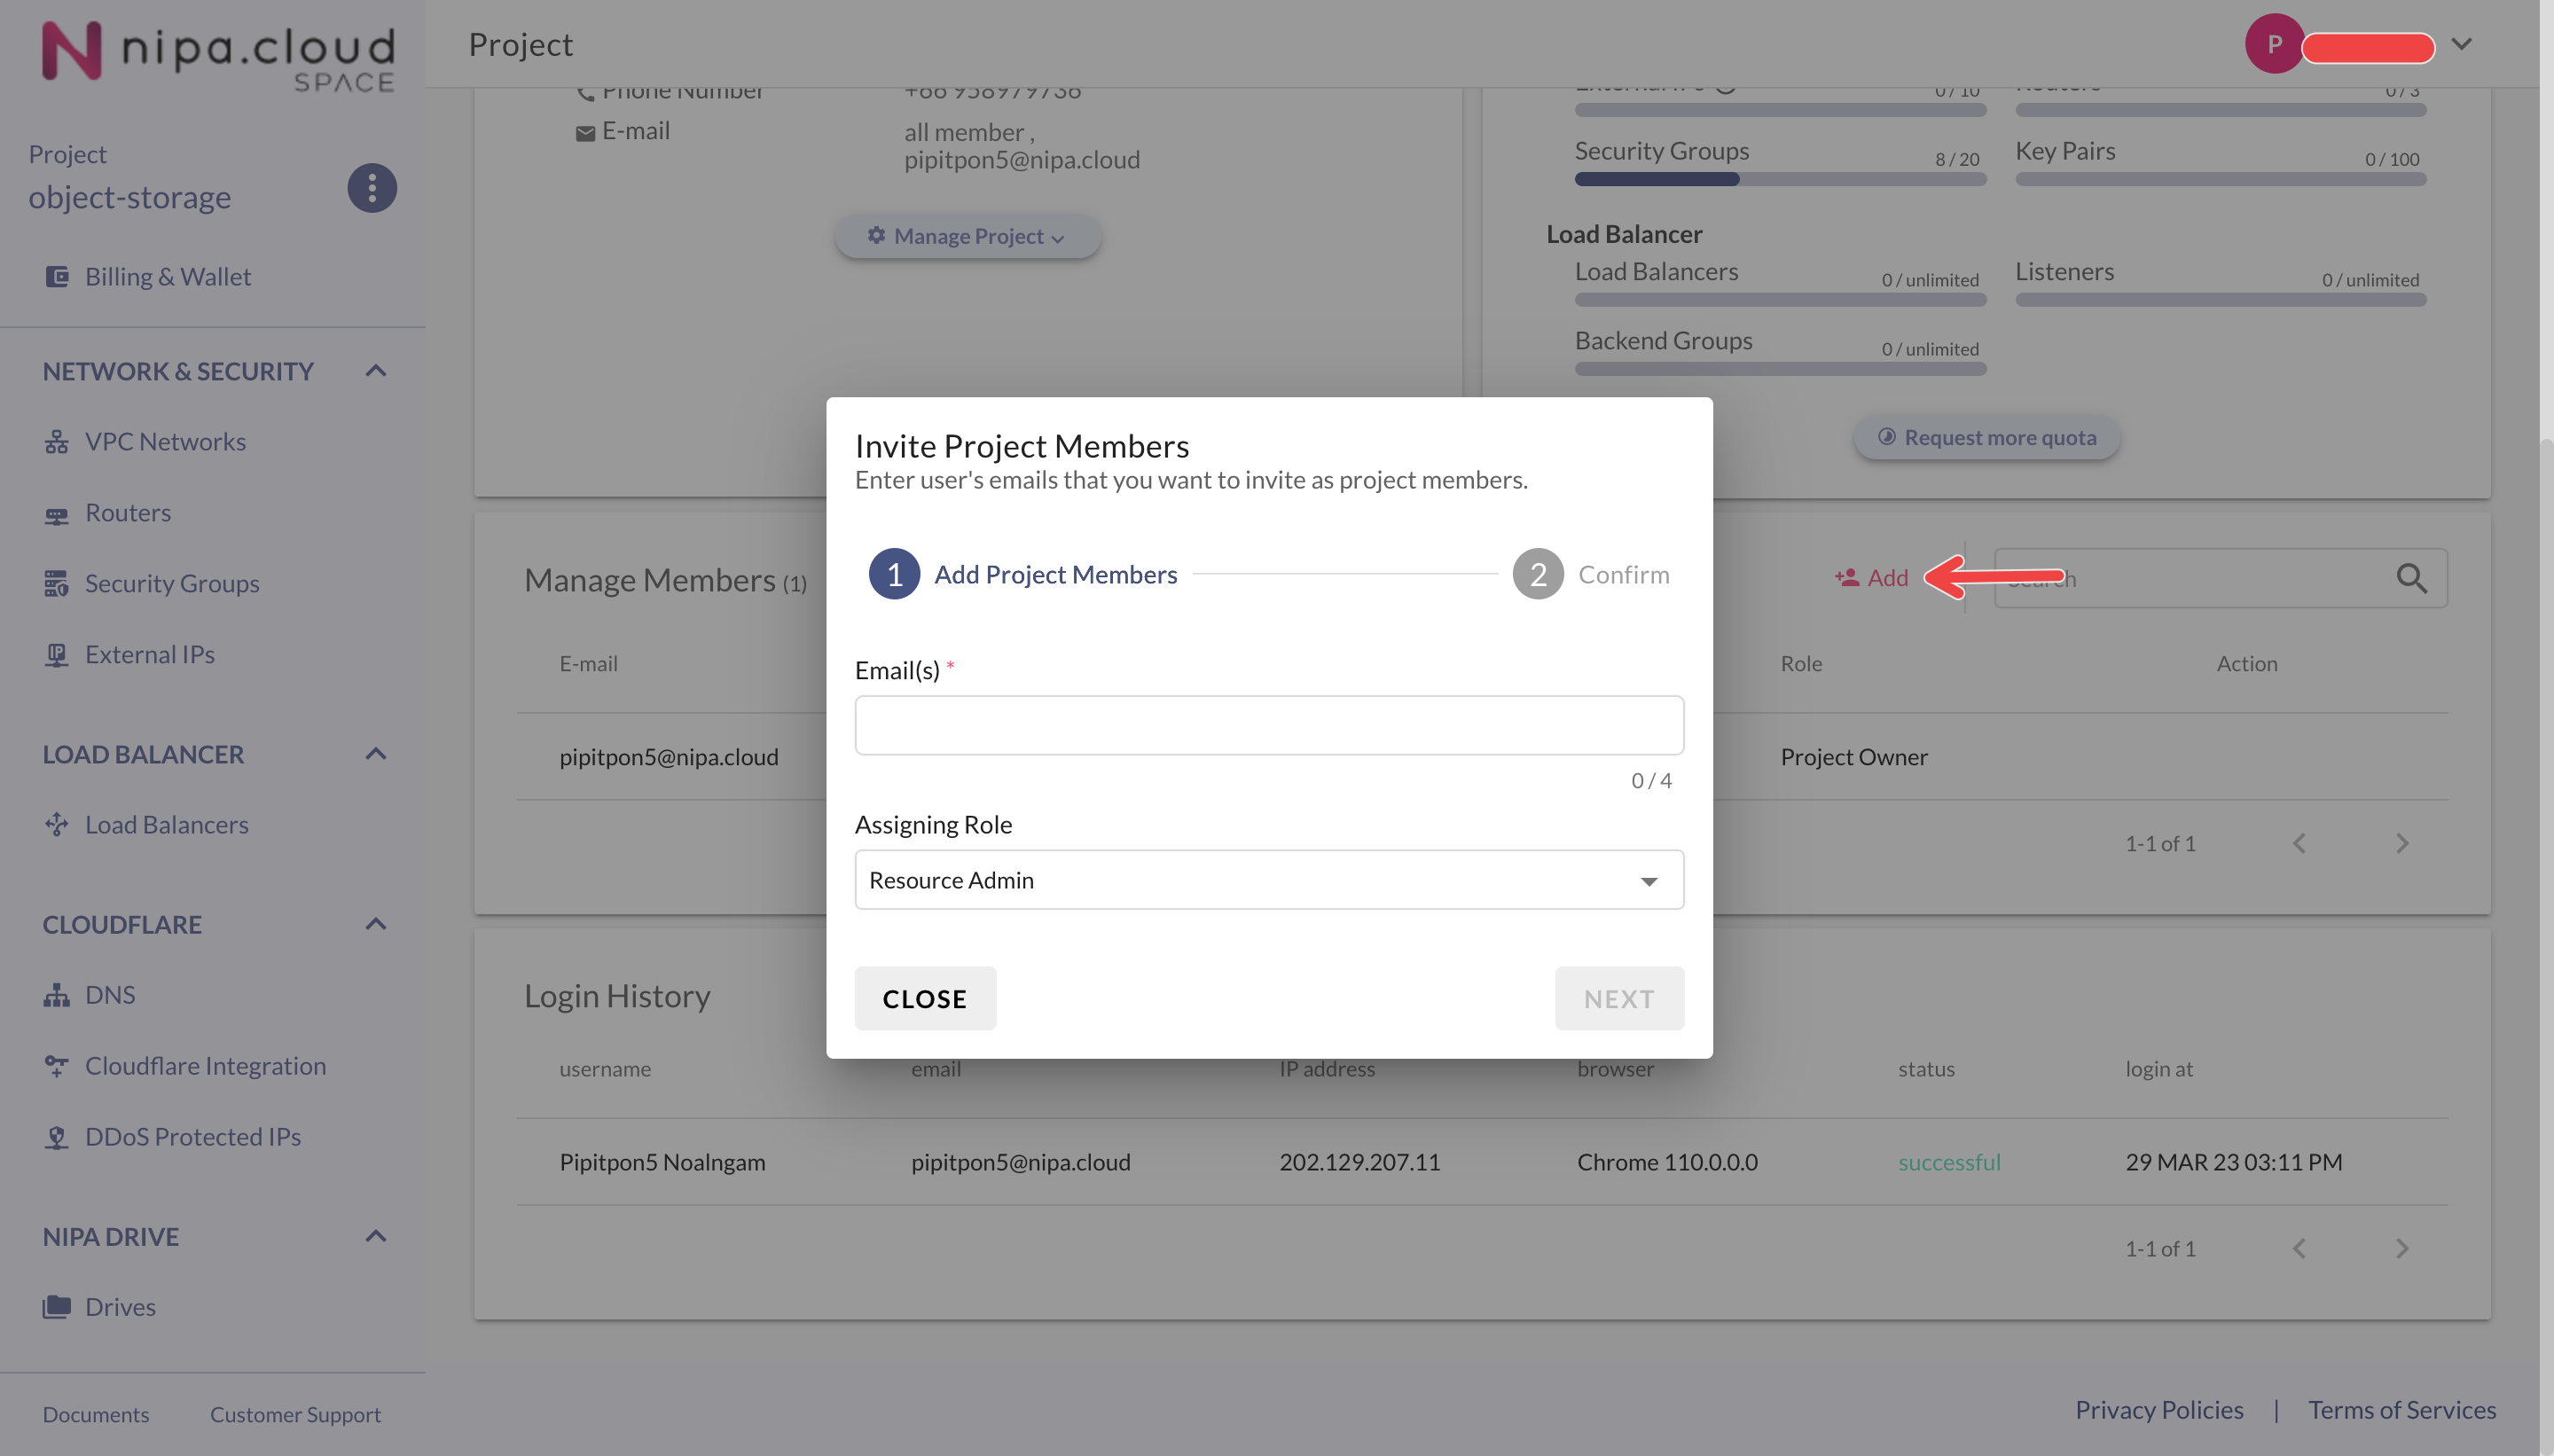
To invite a user, click the **+Add** button in the "Manage Members" section on the Project Overview page. In the "Invite Project Member" menu, enter the email of the user you wish to invite and select either the Biller or Resource Admin role, then click **NEXT**.
Invite Project Member
Enter User's Email
### 3. Review & Confirm Invitation
The system will display a list of valid emails that can be invited and a list of emails that are not registered users and cannot be invited.\
If the list is correct, click the **CONFIRM** button to send the invitation.
Confirm Invitation
The invited user will now be able to see the project and access it according to the assigned role.
### Delete Project Member
### 1. **Enter the Project**
Select the desired project from the Projects Management page to go to its Project Detail page.
Project Detail Page
### 2. **Select the Member to Remove**
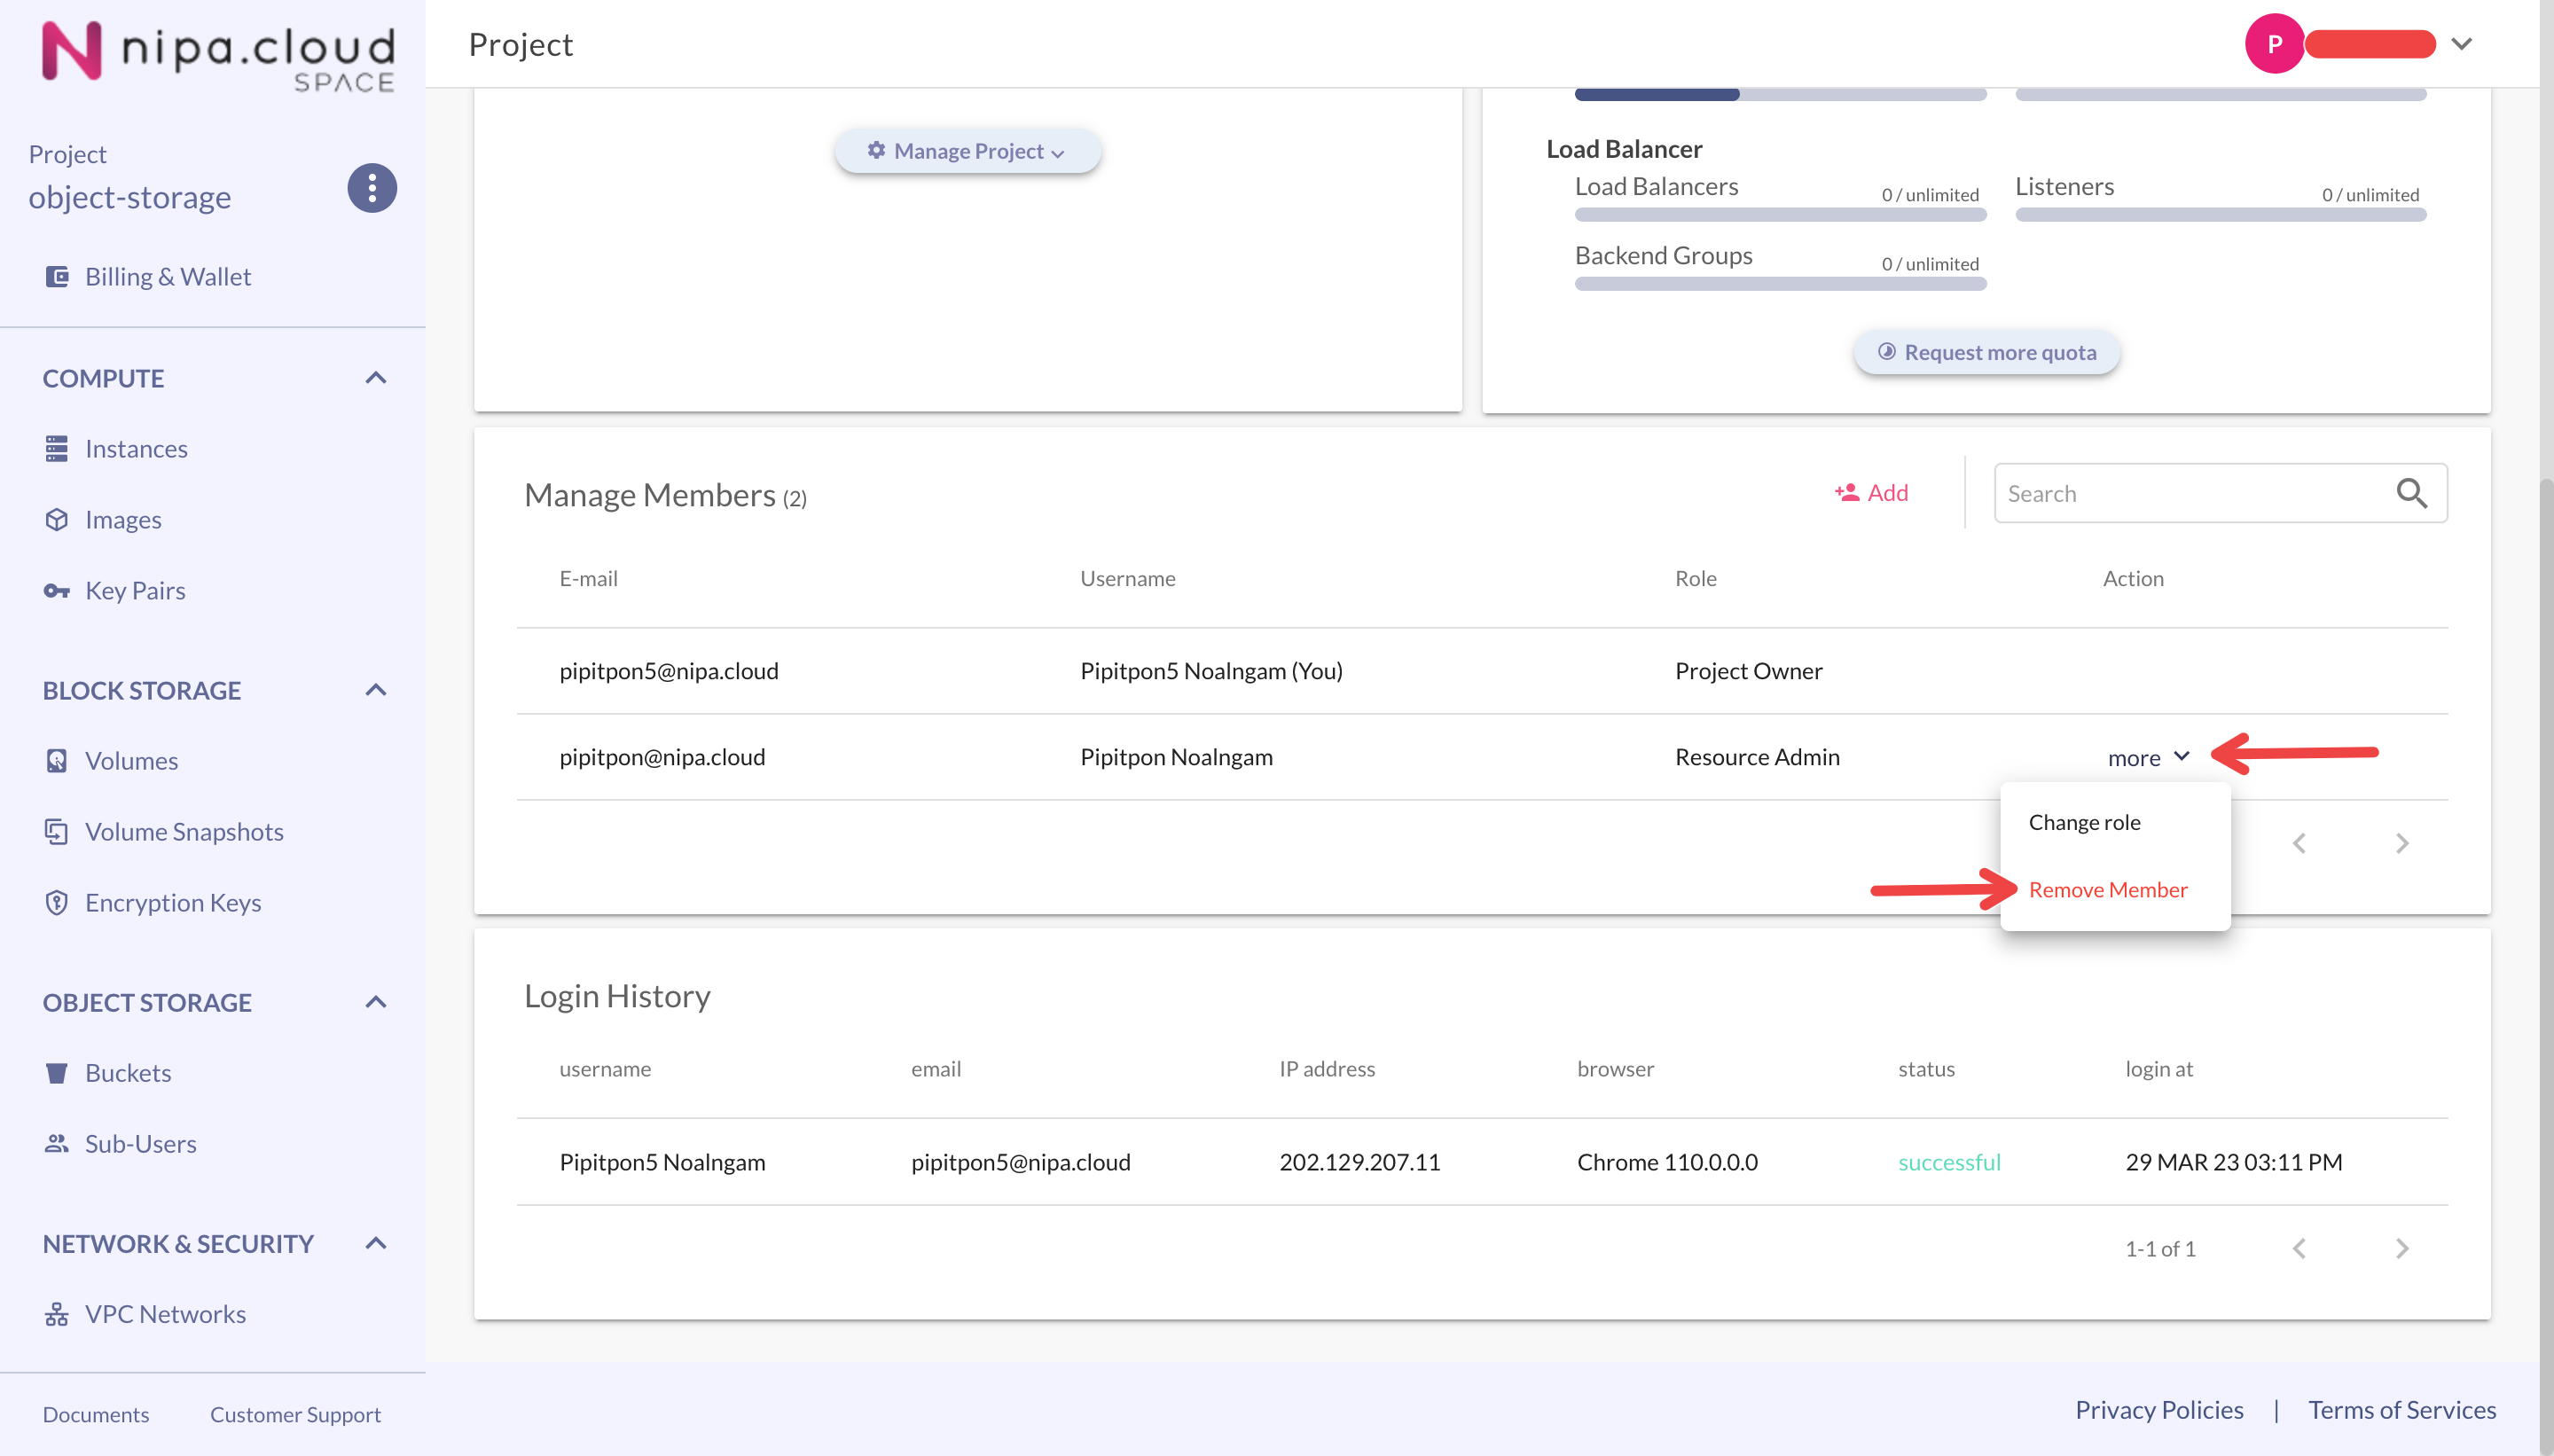
In the "Manage Members" section, find the user you wish to remove. Click the **"more" options icon** (...) next to their name and select **"Remove Member"**.
Remove Member
### 3. **Confirm the Removal**
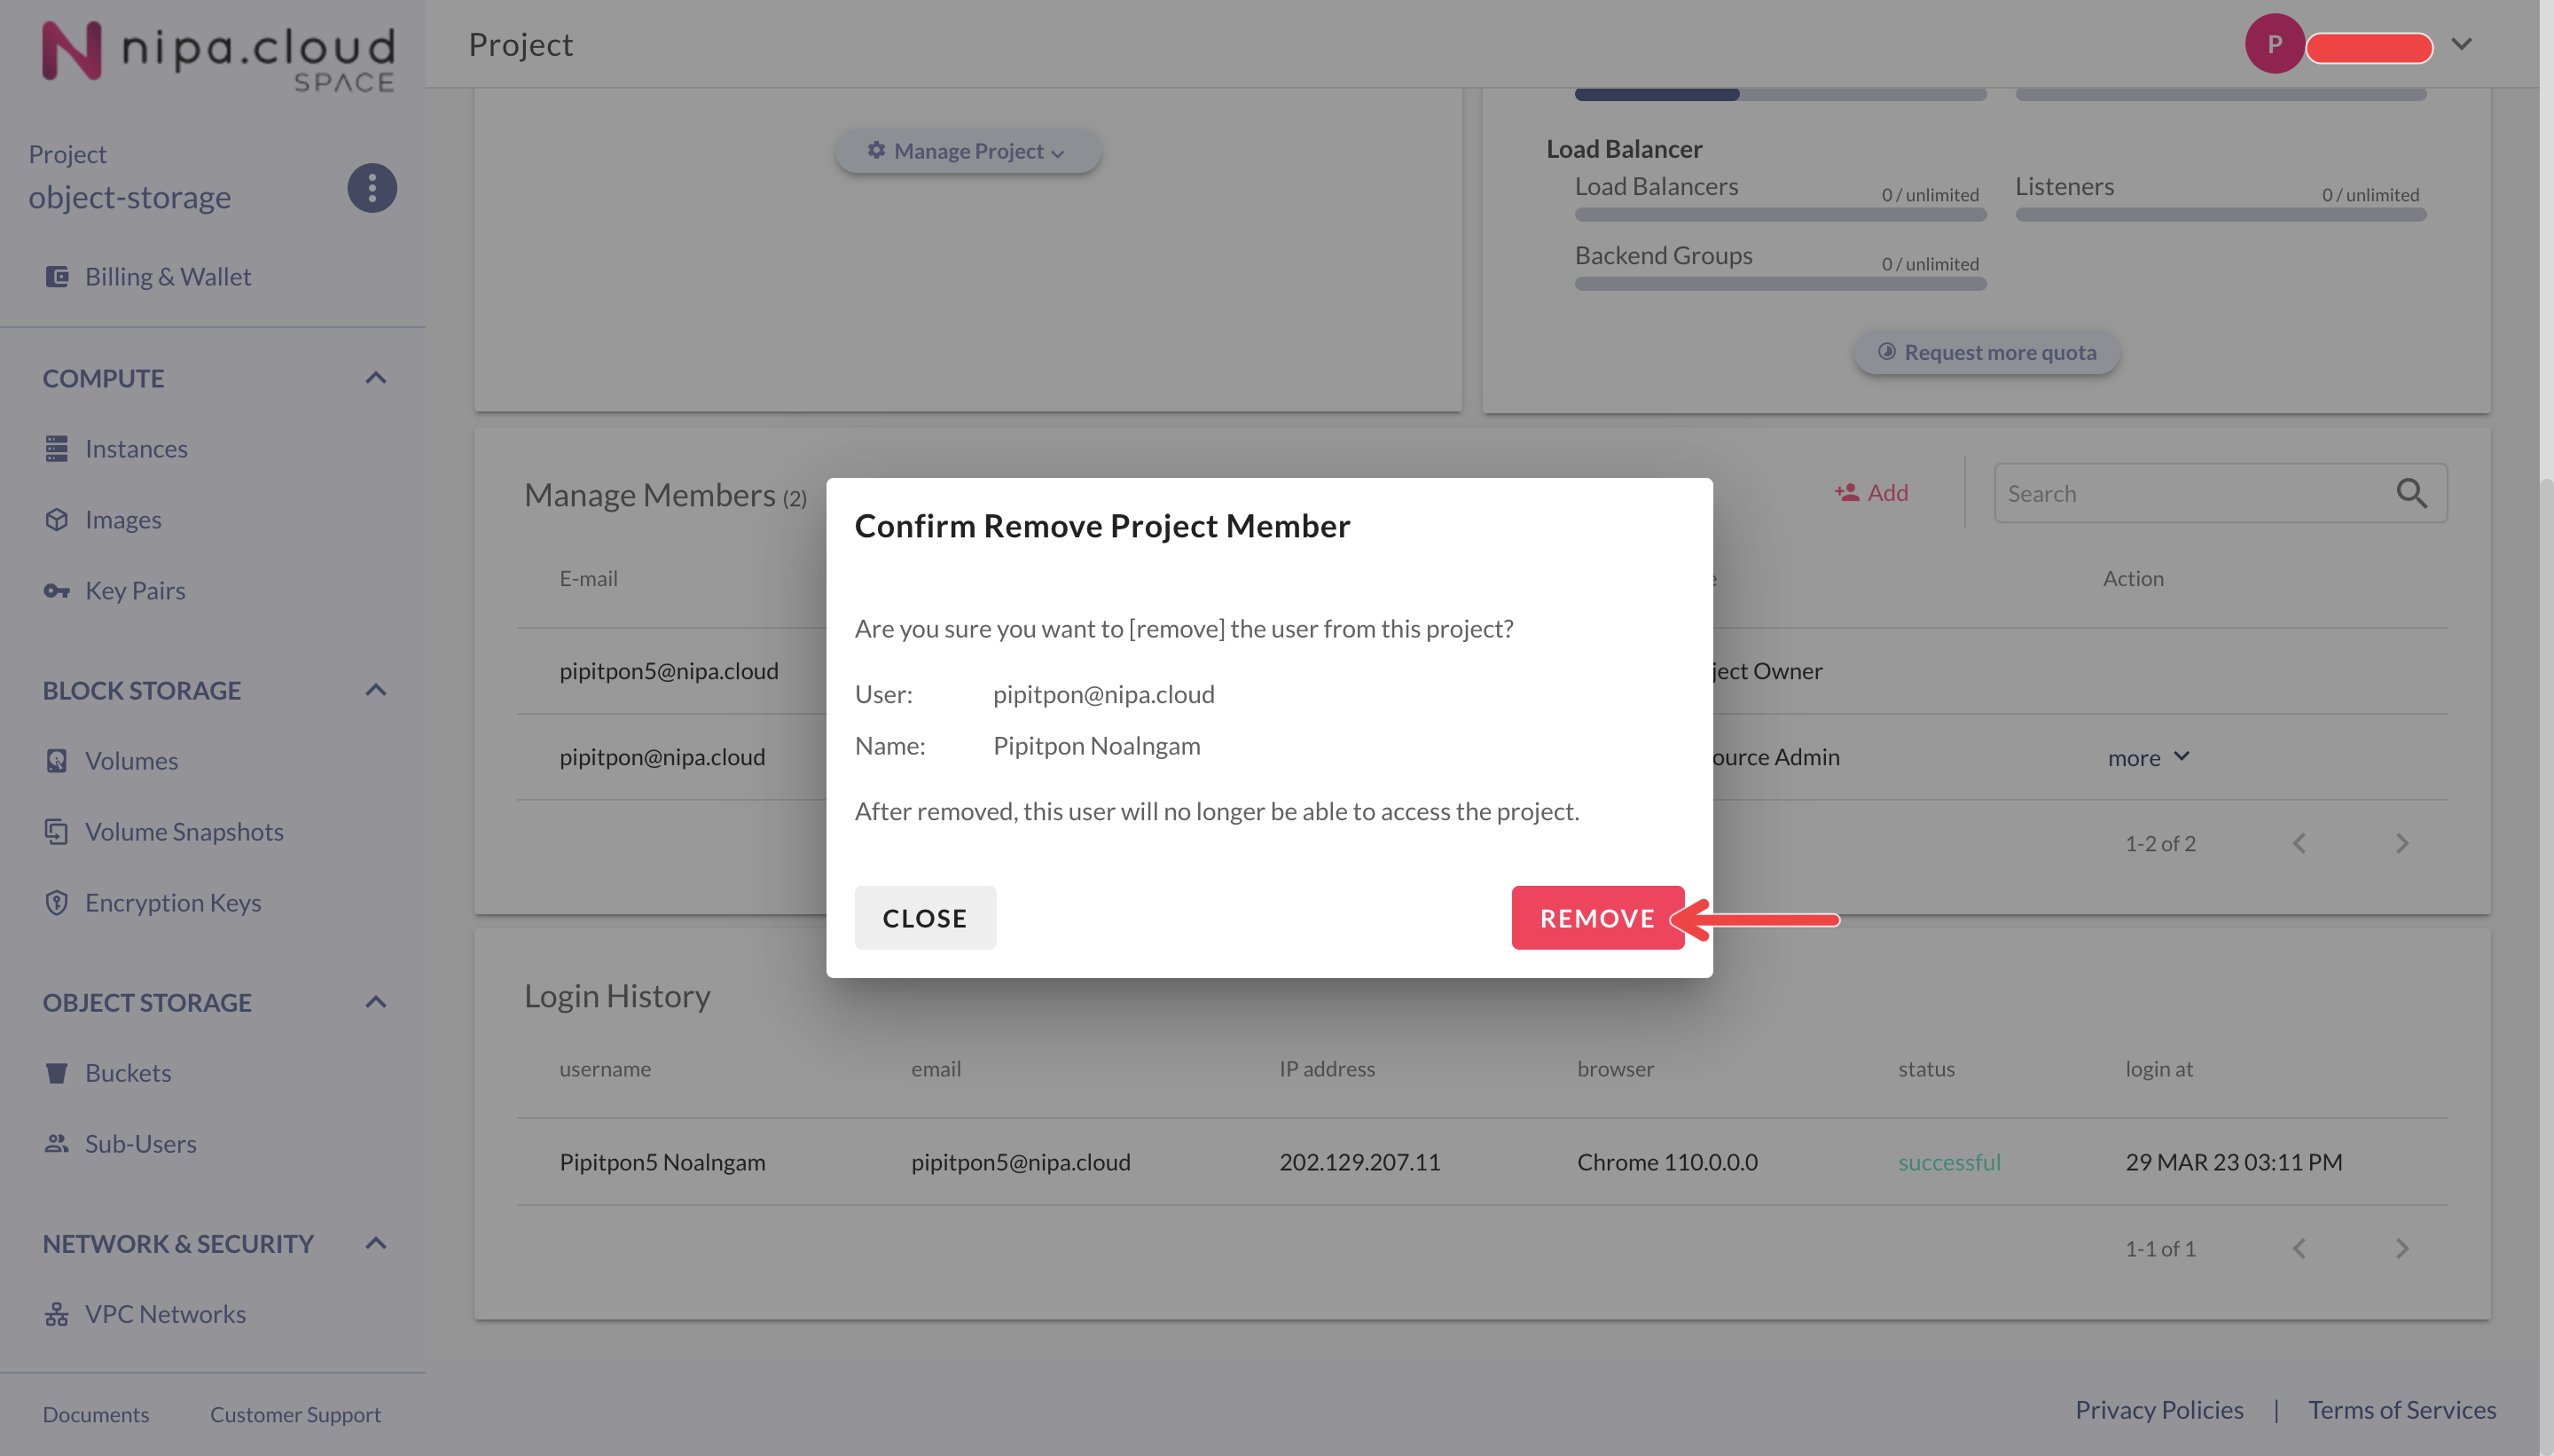
Click the **REMOVE** button to confirm the action.
Confirm Remove Member
The user who was removed will no longer have access to this project.